Category Archives: Equipment, Software & Technique

New York City and ICM

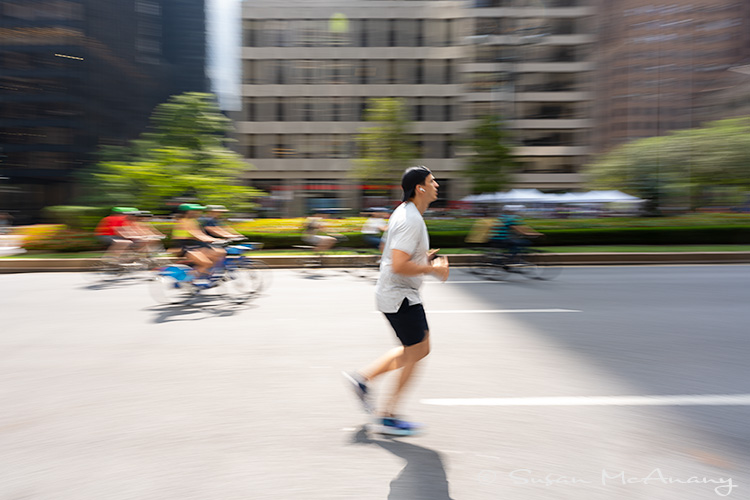
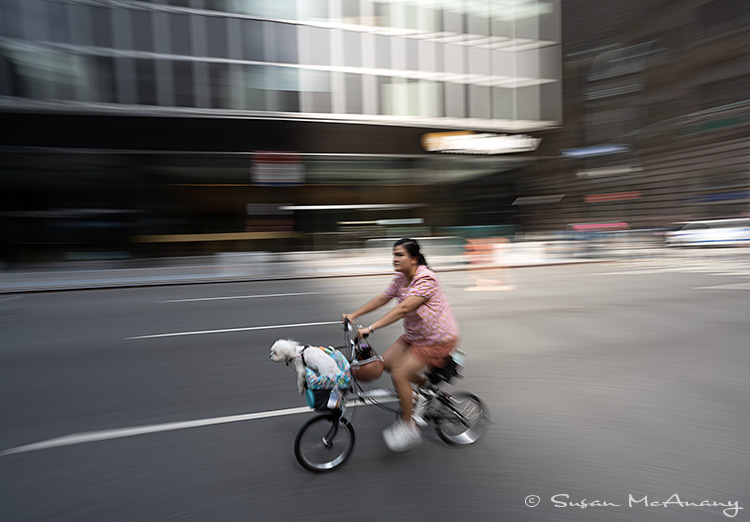
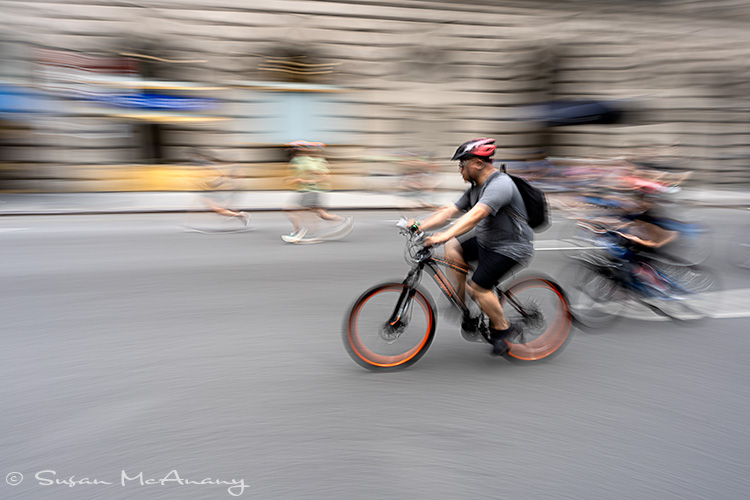
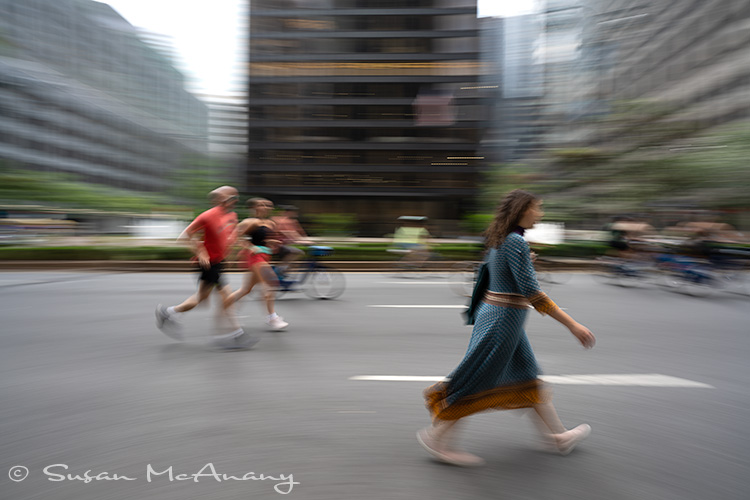
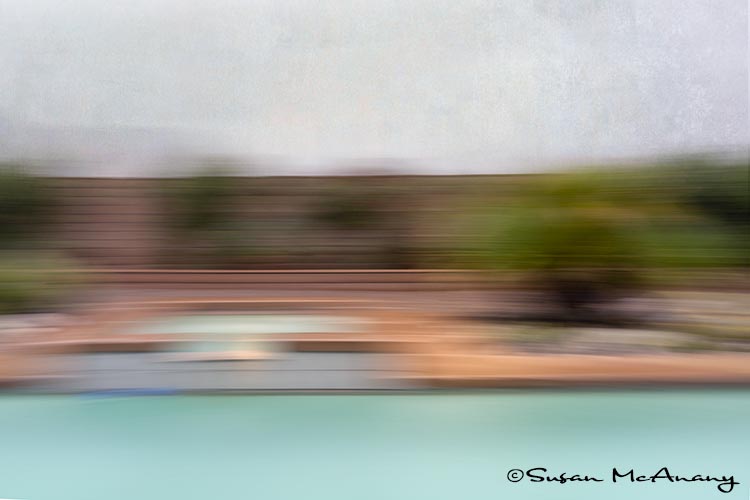
On my last visit to NYC I took to the streets to try some ICM techniques. 

There are so many fabulous things about New York City. If you have ever been, I’m sure you will agree.  The food is outstanding, the buildings are big and interesting and the quantity and quality of entertainment is found no where else in the world.  But another great aspect of NYC is all the people. They come in all shapes, sizes, nationalities and generally pretty darn friendly for a big city. 

I’ve been lucky to visit NYC several years in the summer and I always like to stay over for a Saturday. On Saturday mornings the city hosts Summer Streets, which is a pedestrian friendly event. They close miles of a major city street all traffic lanes and open it to pedestrians to walk, ride, skateboard, roller-skate. Any activity that keeps you moving. And along the way they have music and food venues.

I always like these Saturday mornings and on my last visit I took to a closed Park Avenue to try some ICM techniques with the all the people in motion.

For all of these images, the blur was done in camera with a low ISO (ISO 50) and slow shutter speed (1/4 TO 1/20). The aperture will vary depending on the amount of light. At times, I had a 3 stop Neutral Density filter on. A slight horizontal movement was made with the camera. For these images the movement was horizontal. The technique requires a lot of snaps to get a keeper and I still need a lot of practice.

ICM Images

Post Processing

I use Bridge, Camera Raw and Photoshop as my primary post processing software. I know many people use Lightroom and I am sure you can do many of the same operations in Lightroom.

From Bridge,  I take the Raw image into Camera Raw and make my usual edits.

Next, I open in Photoshop and copy my Background Layer. I then review the image and fix anything that needs fixing. This could be a sensor spot cleanup or cropping of image.

If needed, I add a Levels or Curve Layer to adjust the dark and light areas of the image.

Next, I merge the Layers by selected all layers, holding down the alt/option key and going to Layers > Merge Visible. This will create another Layer on top of your other Layers. This layer will contain all of the edits previously performed, however, you will no longer be able to edit the layers below the merged layer. Unless of course you delete the merged layer, then you still have access to all your work. I recommend you immediately rename this layer. It can get confusing.

From here, I applied a High Pass Filter to the merged layer (Filter>Other>High Pass). For these images, I used a Radius of 12. Don’t be alarmed when your layer turns gray. Just change the Layer Type in the Layers Palette from Normal to Overlay or any of the other types that look interesting to you. 

The High Pass Filter is a form of sharpening filter. If you don’t want the filter effect on the whole image, convert the merged layer to a Smart Object (Layer>Smart Object>Convert to Smart Object), apply the High Pass Filter to the Smart Object Layer, add and invert the mask and with a brush apply the sharpening (High Pass Filter) to specific areas.

You can also just take the merged layer of your image into Nik, Topaz or any number of third party pieces of software to obtain any your vision.

I hope you found this interesting info and I thank you for reading!

It is always fun to try new techniques. Keep shooting.

More of my work can be viewed at susanmcanany.com.


ICM – A New Technique, A New Beginning

ICM, Intentional Camera Movement, is a new technique I am experimenting with. It is a method that requires a slow shutter speed and movement of the camera. There is a delicate balance between the amount of movement and shutter speed required so it takes a bit of practice and a lot of frames to get a memorable shot. But then what in life doesn’t require practice. 

I got interested initially by an YouTube video organized by SHECLICKS.  Charlotte Belamy is the instructor and shoots beautiful nature scenes using this technique and is super forthcoming with data. Roxanne Bouche’ Overton is another outstanding ICM artist and likes to shoot city scenes which I find interesting. I took a two day workshop with her and learned some great info and techniques. 

The easiest and most fun way to take photos using ICM is to use the hand-held method along with a shutter speed of 1/15 of a second or slower and very slight movements of your head to get motion.

Desert Rain f11 1/8 shutter speed

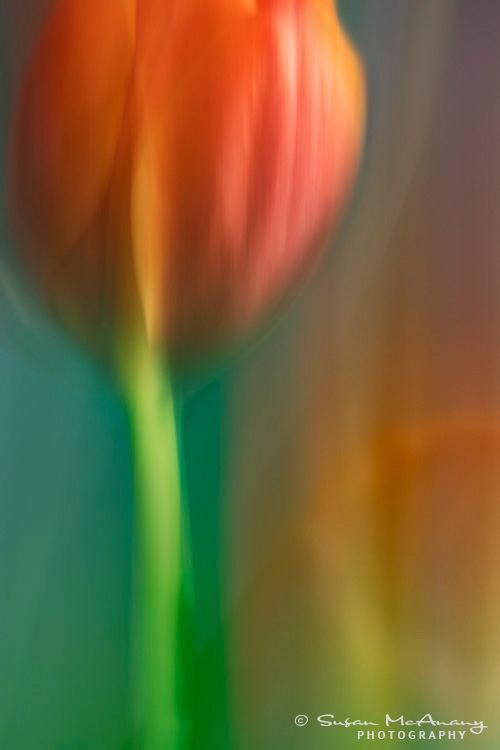
Another method is to mount the camera on a tripod and slowly move the camera. The image below I shot in studio using a tripod. My studio lights were turned on and used for ambient light. I liked this method and the results. But I have a tendency to like things close up.

Peach tulip photographed using ICM technique.

Achieving the slow shutter speed can be challenging at times so reducing the ISO and also the use of neutral density filters can help make that work.

Like anything, the only way to make great ICM images is to get out there and shoot them over and over again. The title of this post states “a new beginning”, and continual practice is where this comes in. Not only is it exciting to capture images that are unique, but I feel like I am beginning on a new photography journey, similar to when I first started taking photos decades ago.  It takes a lot of practice to get a good shot, I’m not sure exactly what I am doing and the results can sometimes be a disappointment. But when a keeper emerges it is thrilling!

Thanks for looking and more of my work can be viewed at www.susanmcanany.com.

Apple Mac Book Pro – My New Best Friend

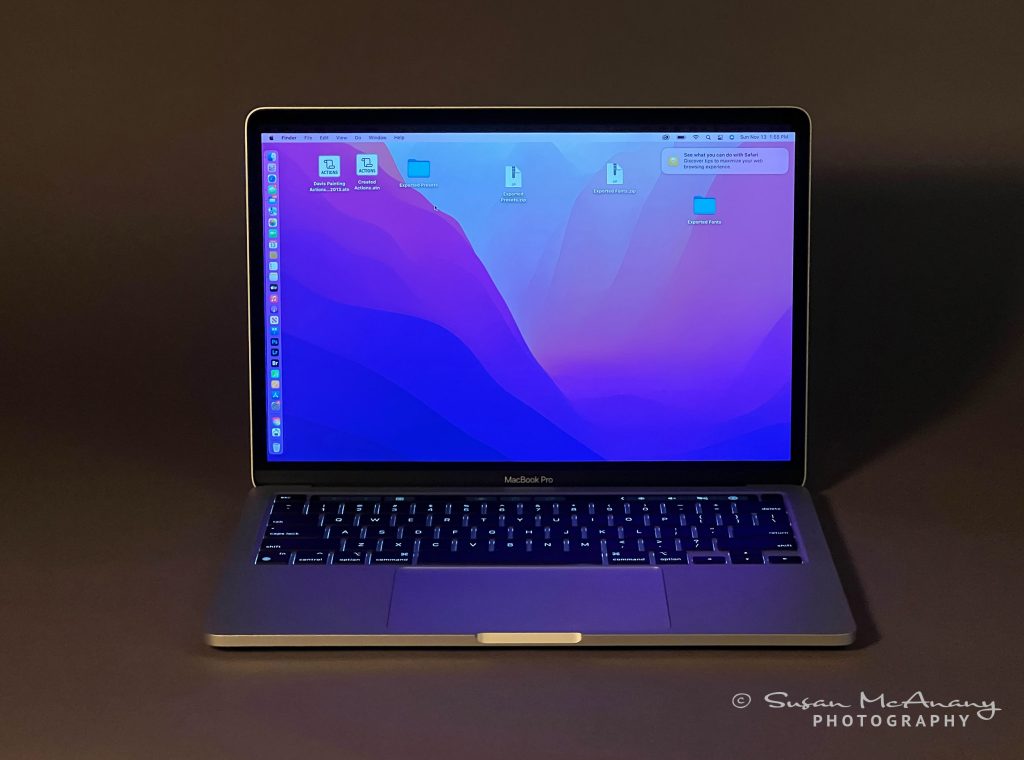
Let me introduce you to my new  best friend, a 2022 Apple Mac Book Pro!

MacBook Pro 2022

This computer is a sweet thing and very maxed out with the M2 chip, 2 TB of storage and 24 GB of memory. I was taught a long time ago it is better to get as much storage and memory as possible, because I like to keep my equipment for a long time. My boyfriend is fond of making this analogy when it comes to storage and memory:  “You can never be too thin or have too much hair”.

My old laptop, also a MacBook Pro, was hard to let go. It served me well for many years as my travel and studio computer. It was still in use until it finally just pooped out after hundreds of thousands hours of use and probably just as many images. I have no complaints. Purchased in 2011, it was a very good friend and workhorse.

Mostly, I am very happy with my new Mac Book Pro laptop. It is sleek, lightning quick, has a long lasting battery and is much lighter than my 2011 version. The new backlit toolbar at the top is cutting edge along with the larger touchpad. The display is very vibrant and it seems like I experience less eye fatigue.

MacBook Pro Keyboard 2022

One thing that I am not too happy about are the number of ports on the device. Hey Apple, what’s with only 2 USB 3.1 ports? This makes it difficult if I want to connect a display, card reader, Wacom and external drives. All of the devices I use on a daily basis. So back to the Apple store I go to buy $70 worth of dongles to make everything work. I’m sure Apple is pleased.

Final analysis is the MacBook Pro is a sleek, beautiful piece of equipment that I hope will serve me for another 10 years without any problems. Prepare yourself for dongle purchases. Now that I’ve made the transition, I am looking forward to having it as my new best friend!

Thanks for reading. My work can be viewed and www.susanmcanany.com!

Make it a great day.

New-Old Image Stacking Technique

Recently I have been trying what I call the new-old image stacking technique. The old comes from having used an image stacking technique quite a bit in my macro work to achieve greater and sharper focus. Focus image stacking increases depth of field, something often needed in macro work.

The new image stacking technique creates a more abstract look. Sharon Tenenbaum teaches an image stacking technique that yields more of an impressionistic image style image using the camera. I really enjoyed the webinar and would recommend Sharon if you have an interest in learning this technique or any other webinars she offers that might interest you. She is great teacher and also gives all attendees a recording of the workshop.

The Technique

In the new image stacking technique you take 5-7 photos of the subject. With this technique it is critical to find an interesting subject and to move around the subject in a semi-circle keeping the subject in the same location in the viewfinder.

From there, download and edit the individual image files in either Photoshop or Lightroom. When edits are complete, load the image files into Photoshop on different layers. This can be done using Photoshop or Lightroom. Attention to lining up the images is critical. I like to select something in the image to use as the focus point and align all layers to that small specific area. Next, a create a black mask for each layer. Then fill the black mask with white of different opacity percentage, allowing different parts of the image to show through. From there, use a brush (20% opacity-black) and take out any detail that doesn’t fit with the composition or the look you are trying to achieve.

Lastly, when the overall composition is complete, merge up the layers and complete any fine tune editing or special enhancement. This includes adjustments such as brightness, color enhancements, etc.  This is done with Photoshop Adjustment Layers, Topaz, Nik Plug-In or other software programs available.

Sample Images of Image Stacking Technique

First Subject using the Image Stacking Technique – Acacia Tree
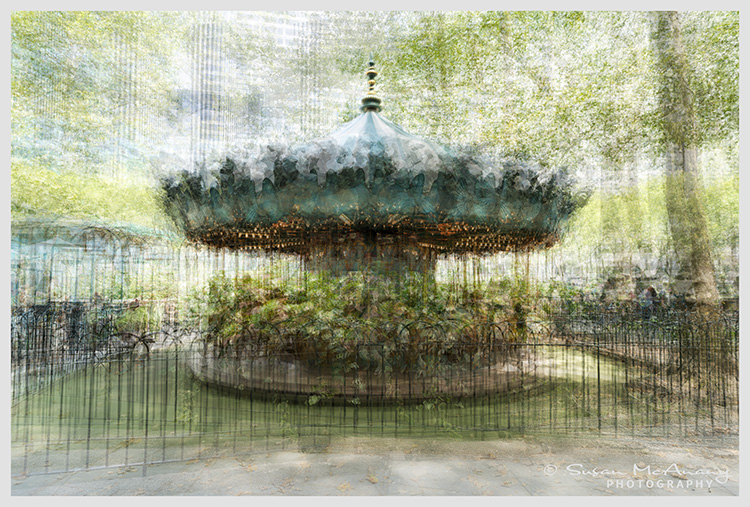
More Recent Image. Carousel, Bryant Park, NYC

I truly love this process and as you can see, you get better with practice! It allows me to be creative in ways I never experienced before. Also, it provides a new twist on an old subject matter.

Thanks for reading and I hope your inspired to try something new with your photography! To view more of work, please visit my website.

Show Your Art In Room Setting

Showing images of your art displayed in a room setting is a very useful tool for on line sales. By placing your art in different room settings, you give a potential buyer a visual representation of how your art could look hanging in their home or office.

After doing a little research, I was able to achieve this with several on line sites where I sell art prints by using free and purchased room “mock up” images. Here are some quick and easy ideas for creating images of your art placed in a room setting.

  1.  Find some free stock images of interior room or room mock ups. Do a quick Google search and you will find many websites where interior room images can be found and downloaded. It takes some searching to find sites that are offering free images, but they are there. Often the author would like recognition for use of there image.
  2. Purchase some images on line. There are stock images sites such as Fotolia, iStock Photo and others who offer images for purchase. Often the images from stock images sites require a subscription I wasn’t interested in or the per image price for me was too expensive.  A good resource for per image purchase is Etsy. I found several sellers that sold interior room images or mock ups for a very reasonable price. Again, just search Etsy’s site for “interior room images” or “room mock ups”.

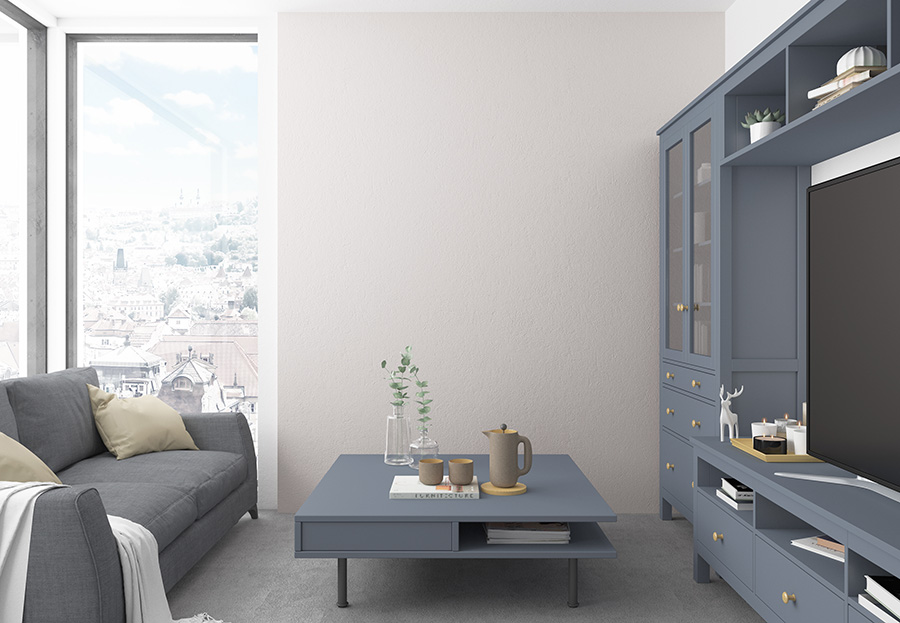
interior room mock up stock image

Interior room mock up image from Etsy with blank wall.

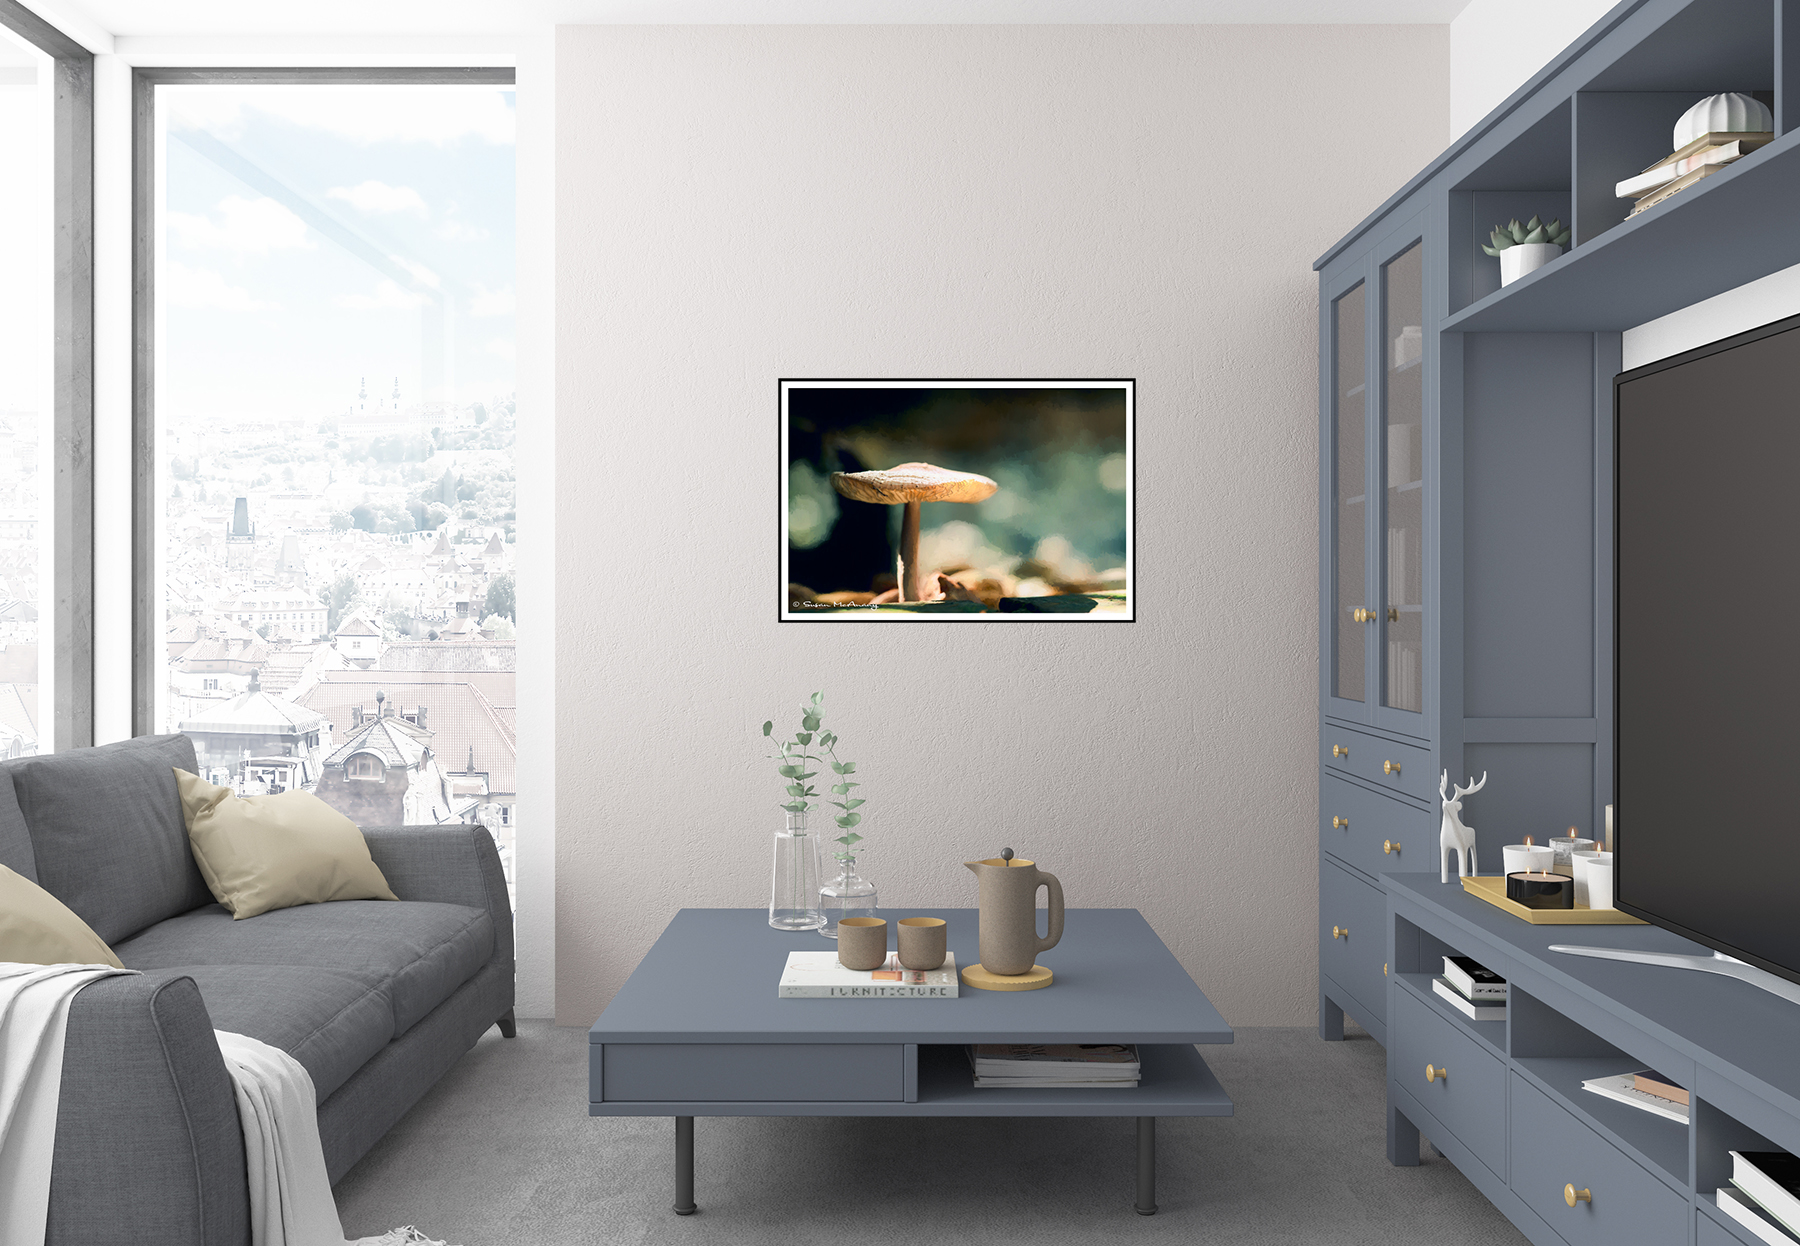
Once you have secured photos of stock images room interiors, you will need to use a photo editing software to place an image of your art on the wall and size it accordingly. I use Photoshop for this process and also I often place my art in a frame prior to placing it in an interior room stock image.

Mushroom fine art photo print

Interior room image with art on wall.

3.  One last resource that is helpful is the website Oh My Prints. This site allows you to place an image of your art into a variety of room settings and save them as jpeg files. The only downside to this program is the image size the program generates. It is often smaller than recommended gallery sizes on several sites. But they do have a variety of great looking interior room images.

Thanks so much for reading and seeing just how easy it is to display your art in a room setting. View more of my work at my website, my Etsy Store or Saatchi Art.

How to Draw a Straight Line in Photoshop

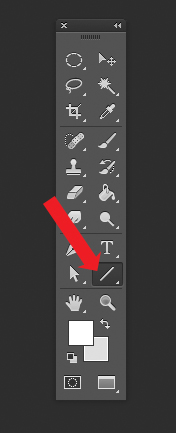
Recently I had the need to create a straight line in Photoshop CS6. I wanted to see how outlining an entire image would look. So of course after pouring through the tool bar looking for a line tool, I finally found one under the box tool. Graphic artist are probably much more familiar with vector files and how to create lines and shapes in Photoshop. As a photographer, I am usually more concern with exposure, colors and composition. However, for this application I needed the line tool and found that in the tool palette.

line tool in Photoshop

Once the Line tool is selected you have the option to adjust the width, color and weight of the line. You could also assign the width and height. For my application I changed the color or Fill to black, used a 3 pt, and Weight of 05 cm.

tool bar for line tool

Once you have your parameters defined you are ready to draw the line. Photoshop will automatically create a new vector layer and place your line on that layer. This is great because chances are it will take a couple tries to get it looking like you desire. With the line isolated on it’s own layer,  it is easy enough to delete the layer and try again.

To draw a perfectly straight line in Photoshop CS6, just simply hold down the shift key while drawing the line. Again, Photoshop will create a vector layer and place your line on the layer.

As you can see this is very easy and soon you will be an expert at drawing a straight line in Photoshop CS6.

Thanks for stopping by. To view more of my work, visit my website!

Photoshop Shortcut Keys I Love To Use

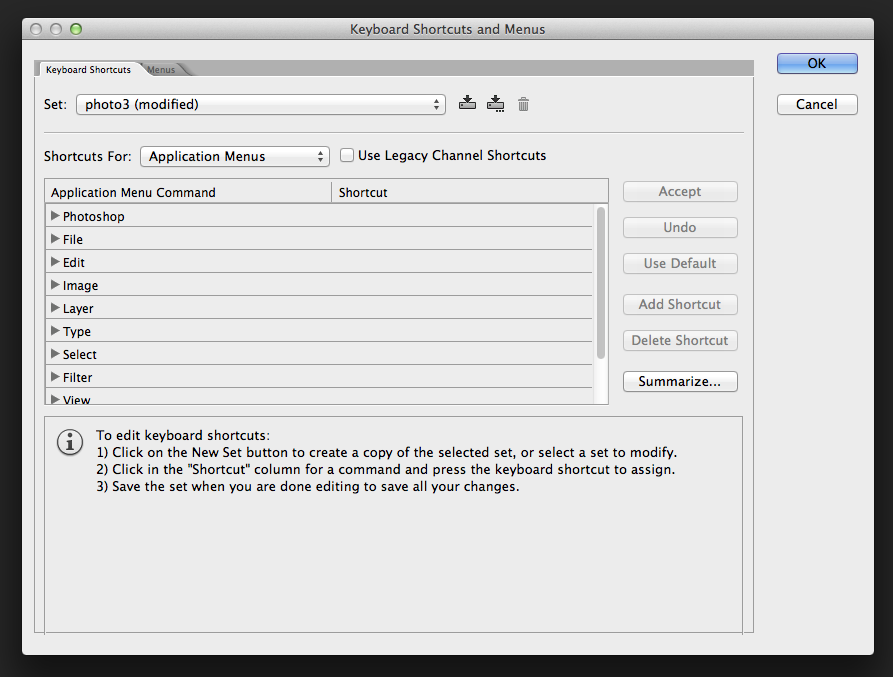
Using Photoshop shortcut keys is one way to simplify and speed up editing an image. Since I am always looking for any method to speed up my process, I find these helpful.  Many shortcut keys are pre-assigned by Photoshop and can be found under the Edit > Keyboard Shortcuts Menu.

Photoshop Shortcut Keys Menu

However, it is also easy to assign your own  Photoshop shortcut keys for processes you do often.

Here are some simple instructions that pertain to Photoshop CS6:

1) Navigate to the Application Menu Command you wish to change.

2) Click on that command  and a white box will be displayed.

3) Press the keys you would like the command to respond to.

4) Press OK.

As you can see in the example below, I have assigned the shortcut keys  for the command for Image > Mode > 8 Bit to Command+B.  If the keyboard command you are attempting to assign is already in use, you will be alerted and you can decide if you want to continue.

Here are a list of some of my favorite shortcut keys:

Save:    Command/Windows + S

Close:   Command/Windows Key + W

New:     Command/Windows + N

Free Transform:   Command/Windows + T

Convert Profile:     Command/Windows + R

Convert to 8 bit:    Command/Windows + B

Invert:    Command/Windows+ I

Merge Down:    Command/Windows + E

Merge Up:    Option/Alt + Command/Windows+ E

Flatten:  Command/Windows + F

Select All:    Command/Windows + A

Deselect All:    Command/Windows + D

Editing  and using Photoshop shortcut keys is very easy to do and will truly help you save time when editing your photos.

Thanks for reading and view my work at susanmcanany.com.


Reimagine an Image With Photoshop

Often when I have an image I like but want to make it stronger I will reimagine the image. This requires thinking outside the box and tapping all of my creative thoughts and ideas. Also, a quiet room, a powerful computer and a few Photoshop plug ins help immensely.

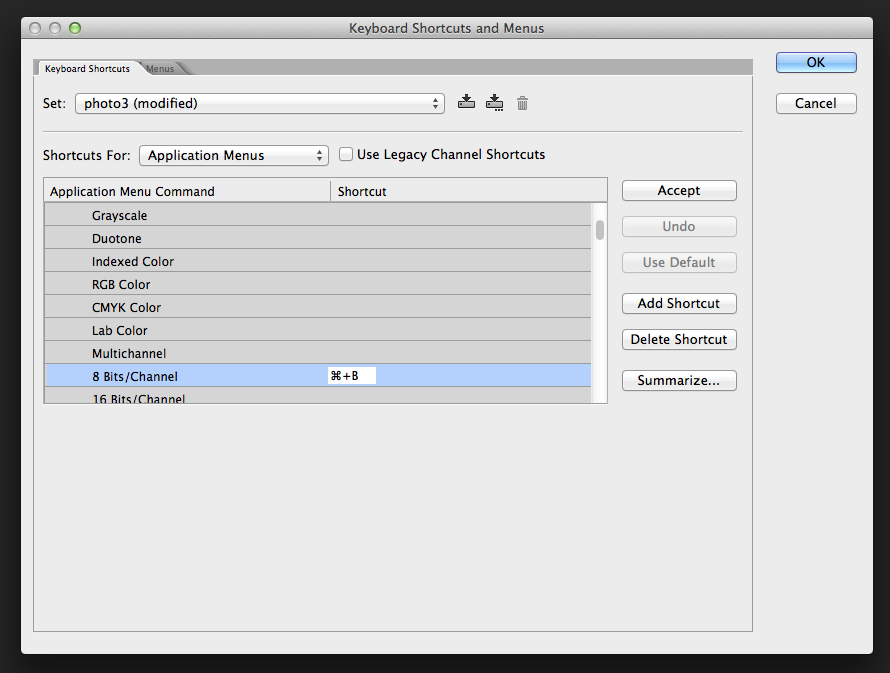
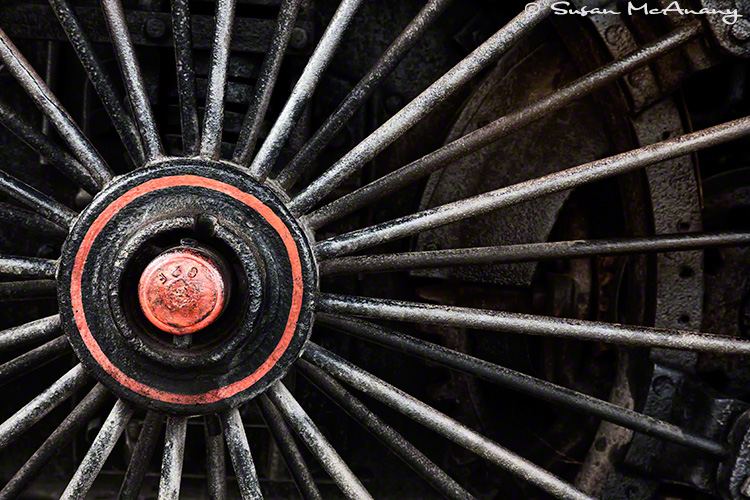
On the example below I first combined two images I had previously taken of a train wheel. I always liked the shape and modern industrial nature of the images, however the darkness of the subject matter had always bothered me.

Reimagine abstract art image of train wheel.

Here is what I did:

  1. I combined the two images in Photoshop by copying one image into the other, creating an image file with two layers.
  2. This allowed me change the Overlay Method on one of the Layers.
  3. Next I did some masking on one of the layers so a more abstract image began to evolve.
  4. I merged up my two layers when I was satisfied with the overall composition.
  5. I used two different plug ins for this image: Topaz Glow and Topaz Impressions  It did take a bit of time and experimentation with both of these plug ins to achieve a result I was happy with.
  6. Finally I used Photoshop Curves Adjustment to darken and lighted areas of the print I felt needed it.

Here are the two images I started with. I personally like the new reimagined image and plan to offer it for sale on my website, but that is of course my taste. People close to me still like the original ones better, so I guess I will leave those also. That is the beauty of digital imaging.

Original Images

Close up of train wheel.

Contemporary image of train component.


As always, thanks for reading and if you get chance visit my website or Etsy store. Keep shooting and experimenting!

Tips for Getting Sharp Images

Recently I had to mentally review tips for getting sharp images for a project I am working on. Now many of these techniques I have been using for years, but this project involves a macro lens and a moving subject so I needed to dig deep for all tips and techniques for getting sharp images I have come across throughout my photo career. Here is what I came up with and I wanted to share them with you.

Tips for Getting Sharp Images

  • A fast shutter speed is required to freeze movement, so make certain the Aperture and ISO on your camera are set appropriately to achieve a Shutter Speed of at least 200. Faster if you can get it there because the faster the better for freezing movement.
  • Depending on lighting conditions, there is a good chance you will need to increase your ISO to reach a fast enough shutter speed.
  • If using an external flash, experiment with High Speed Synch to see if that would be useful.
  • Use a support system. This could be a tripod, monopod, a pile of books or wall to brace yourself or your camera.
  • Invest in a camera shutter release or use the self timer on your camera.
  • If you are not using “live view” on your camera, use the mirror lock up function if available.

If you follow a few of the recommendations above for tips for getting sharp images, I am sure your images will be sharper and move beautiful.  Most of all have fun when you are shooting.

Here is one of the images I have been working on.

Tips for Sharp Images


Thanks for reading and check out more of my work at www.susanmcanany.com. Also if looking for great stock images, visit my Etsy store. I offer a wide range of digital downloads.


Capturing Lightning Strikes With iPhone

The other night I had a great opportunity to capture lightning strikes with an iPhone.  Anyone who lives in Florida knows one thing for sure, we have some dramatic weather, from beautiful skies and sunsets to tremendous lightning storms. It can be quite a show. Now, I am not by any means a storm chaser since I like to seek shelter quickly if the situation demands it.  So for capturing lightning I try to keep it simple and using an iPhone is the utmost in simplicity.

For the two images below I hand held my iPhone, however,  they probably would of been slightly better on a tripod. Everything is better on a tripod and since I am a bit of a perfectionist, I am now looking into a tripod mount for my iPhone. One thing I did use was a great App, iLightningCam, that triggered the camera when a lightning strike was detected.  Every time a strike was detected it would rapidly fire off 5-7 images.  I probably shot 100 images or more to get the two below. I also have an iPad and it was helpful to let them copy to the iPad for viewing editing and deleting.

Tips for capturing lightning with iPhone:

Purchase the App iLightningCam or something similar.

Be sure your iPhone has enough available storage space. The App fires off many images and it takes a lot of tries to good ones.

Make certain you have a fair amount of battery juice available. It takes power to write all those images to your storage.

Use a tripod if you have one or focus on holding the camera steady.

Try to keep the horizon level.

Experiment with the different menu items of the App to find which one works the best for you and your lightning show.

Above all else, stay safe!

Lightning strike on Sarasota Bay


lightning storm sarsota, fl

Thanks for reading and be sure to check out more of my work at www.susanmcanany.com