Tag Archives: Photoshop

How to Draw a Straight Line in Photoshop

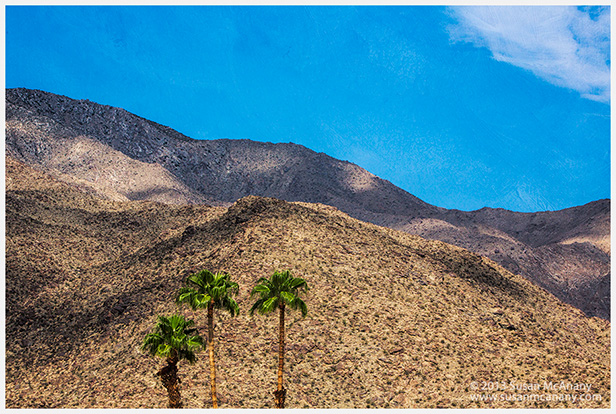
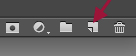
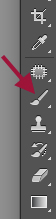
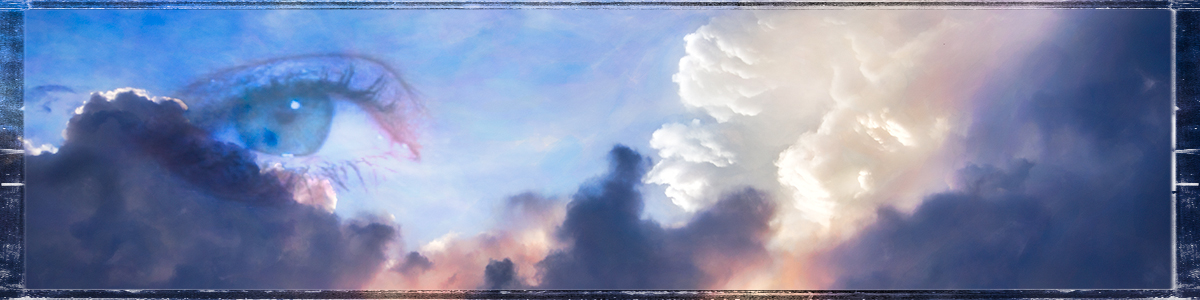
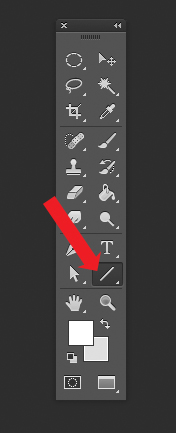
Recently I had the need to create a straight line in Photoshop CS6. I wanted to see how outlining an entire image would look. So of course after pouring through the tool bar looking for a line tool, I finally found one under the box tool. Graphic artist are probably much more familiar with vector files and how to create lines and shapes in Photoshop. As a photographer, I am usually more concern with exposure, colors and composition. However, for this application I needed the line tool and found that in the tool palette.

line tool in Photoshop

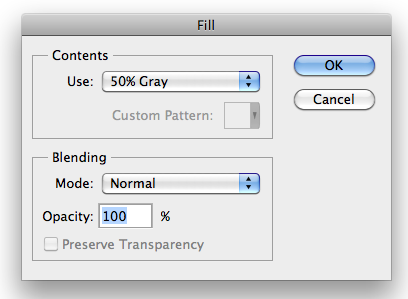
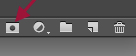
Once the Line tool is selected you have the option to adjust the width, color and weight of the line. You could also assign the width and height. For my application I changed the color or Fill to black, used a 3 pt, and Weight of 05 cm.

tool bar for line tool

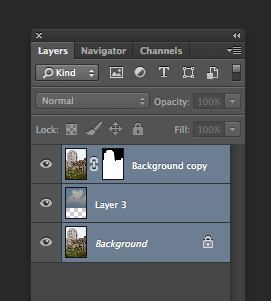
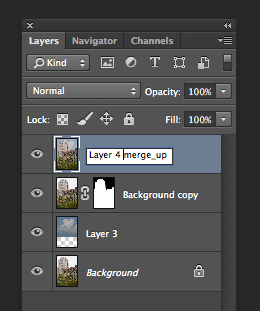
Once you have your parameters defined you are ready to draw the line. Photoshop will automatically create a new vector layer and place your line on that layer. This is great because chances are it will take a couple tries to get it looking like you desire. With the line isolated on it’s own layer,  it is easy enough to delete the layer and try again.

To draw a perfectly straight line in Photoshop CS6, just simply hold down the shift key while drawing the line. Again, Photoshop will create a vector layer and place your line on the layer.

As you can see this is very easy and soon you will be an expert at drawing a straight line in Photoshop CS6.

Thanks for stopping by. To view more of my work, visit my website!

Copyright Symbol Tips ©

I probably use the copyright symbol ©  daily as I prepare images for the web. Not only does it make me feel as though the image is somewhat protected, I think it looks kind of cool on the image. It is so incredibly easy to do and I encourage you to put your name along with the copyright symbol on your work also.  Some people suggest the date should also be included along with the symbol. I think for commercial work this is incredibly important. For my fine art work, I find it to be a bit intrusive. I do of course complete the metadata file with the copyright symbol,  date, and also with the phrase:  All Rights Are Reserved for any images I post to the web.

Creating the Copyright Symbol

On a Mac: press alt/g

On a PC: Press the Alt key/key in 0169 on numeric keypad

Here are a couple of images with the copyright symbol on them. I created the symbol and text in Photoshop using the text tool. Once I knew my standard image size, it was easy to create an Action in Photoshop to generate the the copyright symbol along with any text, font size and color you may want to add.  With the addition of a Photoshop Action placing the necessary symbol and text on your images is now an extremely quick and easy task.  Another important step to protecting your work is to consider registering your images with the Copyright Office in Washington DC. Over the years this process has become quite easy also especially since currently it can be done all on line.

rustic farmhouse sepia toned print with copyright symbol

“Desperation” © Susan McAnany – All Rights Are Reserved


Pepper kitchen art print with copyright symbol

“Pepper Line” © 2007  Susan McAnany – All Rights Are Reserved


Thanks for reading and if you have time, check out more of my work at susanmcanany.com

Print Size Feature In Photoshop

Ever wonder if the Print Size display feature of Photoshop is accurate in showing you the detail of your image? This Photoshop feature for CS6 is located under View on the top toolbar of Photoshop.

If you have a lot of prints professionally printed like I do or if you print yourself, you want to get as accurate visual of your print as possible prior to sending it off to a printer or printing it yourself. In order to do this you must make sure the resolution of your monitor reflects as accurately as possible the pixels per inch you plan to print. The default is Photoshop is your screen dpi.  We all know printing cost money regardless of how you do it.  Thus when using the Print Size feature in Photoshop you are a little bit closer to viewing the actual output .

After doing some research, here is a quick and easy way to determine and adjust your monitor resolution.

  1. Open Photoshop and create a blank square white page at 300 dpi utilizing the top tool bar File > New. For this example I made mine 7 x 7.  New Page Screen CS6
  2.  In Photoshop go to View > Print Size.
  3. Using a ruler or measuring tape carefully measure the width of the blank square white page. Be carefully not to scratch your display. I used a soft measuring tape and it worked great. My page measured 6 inches. Yours will undoubtedly be different. It depends on the monitor you are using.
  4. Next, divide the width of your white blank page by the measured inches. I divided 7 by 6 for a quotient of 1.16
  5. Multiple 1.16 by 72, which is the current screen resolution on your monitor. My answer was 83.52 that I rounded up to 84.
  6. The final step is go to Photoshop>Preferences>Units & Rulers and update the screen resolution to the number from step 5.  Units & Rulers Screen CS6

And that is a quick and easy way to synch your screen resolution to reflect your print size and hopefully gauge print output using the Print Size feature of Photoshop.  In order to utilize this function when viewing an image be sure to look at it in actual print size by going to the top tool bar in PS and selecting View>Print Size.  Also, this technique is geared for Photoshop CS6.

Thanks for reading and my work can be viewed at www.susanmcanany.com.


Blur Photo Border using Photoshop

Here is a quick and easy technique to blur photo border using Photoshop. I found this is helpful in portraits to bring more emphasis to the subject matter similar to adding a vignette. It is also helpful diminish any distracting details that may be in the background or  to blend an expanded canvas with the original photo.

1. In Photoshop, copy your Background Layer or click on the Background Layer to convert it to Layer 0.

2. You can use either the elliptical or rectangle tool to isolate the area you want in focus. Personally, I tend to use the elliptical tool more frequently. It seems to blend better for me.

3. Feather the area between 5 and 10 pixels. You may have to experiment with the amount depending on your subject and composition.

4. Invert your Selection by either using shortcut keys Shift/Command/I or the top toolbar Select > Inverse.

4. Create a Layer Mask by clicking on the Add Layer Mask icon on the bottom of the Layer’s Palette.

5. Create the blur using the Gaussian Blur filter. On the top tool bar select Filter > Blur > Gaussian Blur. You will also have to experiment with amount to get the your desired effect.

6. If the blur is too intense, use the Opacity Slider to decrease the amount on the Layer Pallete. If you would like to remove the blur from certain areas, use your brush tool on the Layer Mask  and paint in black the areas you want to remove or in black for areas you want to add the blur.

As with much of Photoshop, there are many ways to do one task or effect and to blur photo border is no exception, so experiment with this technique and other Blur options available under the Filter Toolbar or also with the Blur Tool.

Thanks for reading and happy editing. Visit my gallery to view more of my work.


Photoshop Merge Up Technique

If you edit using multiple layers in Photoshop, the use of the Merge Up technique is very helpful. It eliminates the need for saving multiple copies of an image in various stages of editing.  Also, not only does it save on disk space, but helpful for finding, organizing and retrieving edits associated with an image.

To use Photoshop to Merge Up Layers is actually quite easy. First, select the layers you would like to Merge by clicking on the first and last layer in the Layer Palette while holding down the Shift Key. Once selected all of your layers will be highlighted as illustrated below:

Photoshop Layers SelectedNext, hold down the Alt/Option Key and go to the top toolbar in Photoshop and select Layer > Merge Visible.   mergevisiblePhotoshop will then create an additional Layer, which I always rename Merge-Up.

Merge Up Layer

I hope you find this helpful and more of my work can be viewed at www.susanmcanany.com.


Desert Family – Image From My Archives

Keeping with my previous goal of finding new images, “Desert Family” is a photo I made a couple of months ago while in California. My ideal workflow, if I am not on deadline, is to review my images right after shooting because I always want that immediate gratification, which is the beauty of digital. But often, I like to let some time pass before doing significant post processing.

How I Post Processed

My post processing for “Desert Family” consisted of accenting the things I really liked in this image. The bleakness of the desert mountain against the deep blue sky really captured my eye, along with the shadows the clouds cast on the mountain. The addition of the three green palm trees adds an element of life into the bleak surroundings that is characteristic of the desert.  I used Photoshop’s Curve Adjustment Layer and selected specific areas in the shadows and highlights of the mountain to accent some of these areas. I also added a Hue & Saturation Layer to bring out more blue in the sky. To complete the image I used a texture over the sky to give it that portion of the image a more painterly effect.

The Image “Desert Family”

Desert Family

Thanks for reading and you can view more of my work on my website.


Non Destructive Dodge & Burn in Photoshop

Here lately I have been focusing on taking my Photoshop skills to another level and I came across some great information about how to Dodge and Burn using Photoshop non destructively.  For those of you photographers that have never been in the darkroom, the dodge and burn tools originated there. The concept is to control the light from the enlarger as it hits a piece of photographic paper.  Allowing more light to reach an area of the paper would increase the exposure or darken that area of a photo This technique was called “Burn” or “burning it in”.  Alternatively, you could also block the light from hitting the photo paper using a piece of paper or your hand and this was called “Dodging”.

In Photoshop’s Toolbar there are two tools called the Dodge and Burn Tool and apparently using these two tools are fairly destructive to pixels of an image thus not very good for image quality. If you are concerned with IQ, Here is a quick and easy way to to dodge and burn your image non destructively. It is also good for creating a vignette on an image.

1)   Create a New Blank Layer by going to Layer > New > New Layer or by clicking on the New Layer Icon at the bottom of the Layers Palettenew layer icon photoshop

2)   Fill the layer with 50% grey Edit > Fill . Your image will turn gray at this point. Don’t panic.fill screen photoshop

3)   Create a Layer Mask by clicking the icon on the bottom of the Layers Palette.mask tool icon4)   Invert the Layer Mask  – CMD/I. Your image should now reappear and your mask will turn black.

5)   Select the Brush Tool (b)brush, tool, photoshop

6)    On the Layer Mask, paint with Black in areas you would like to be darker or “burn in”. Use the x key to switch to white and paint any areas you would like to be lighter or “dodge”.

Thanks for reading and more of my work can be viewed on my website or at my Etsy Store.


Photoshop CS6 – Why did I wait so long?

I finally broke down and purchased  Adobe’s Photoshop CS6 and now I am wondering why I waited so long. Although I spend a lot of time on the computer, I would rather be in the studio than installing and reinstalling software and plugins. That is not high on my priority of things I like to do.  With that said I have to admit I am finding a lot of great new features in Photoshop CS6 and I am sure more to come.  I love the new darker user interface of CS6 and many of the tools seem much more intuitive, like the Crop tool. While keying in your size, it shows a visual of how the Crop will look. From there you can make further adjustments. The Patch tool now has the Content-Aware feature similar to the Healing Brush in Photoshop CS5 and the Mini Bridge will display a filmstrip, which could be helpful with opening images. Although, I tend to open my images directly from Bridge. I need a slightly larger photo than a thumbnail for the selection process. I am eager to see if any enhancements have been made to the Brush tools.

However, the main reasons I upgraded was for better computer performance and I am happy to report my tower is once again a screamer.  Also, I read Adobe will only offer upgrades from the previous version of Photoshop otherwise a new purchase is required or a move to the Cloud, Adobe’s newest marketing idea.  So I figured might as well take the plunge. If you haven’t yet, I think you should also.

Thanks for reading and happy editing!

Check out my fine art prints at www.susanmcanany.com.

Adobe Photoshop Blending Modes Shortcut Key

Toggling through Adobe Photoshop Blending Modes using a shortcut key is very useful and easy to do.  Here lately, I have been making a conscious effort to streamline some of my keystrokes while working in Adobe Photoshop by using the shortcut keys Photoshop offers and also programing my Wacom Intuos 4. I must admit it has helped. Not only is it helping with speeding up repetitive key stokes but also with my body mechanics on the computer.  One shortcut key that I have found particularly useful is for changing Photoshop Blending Modes in the Layers Palette. I often find I do an edit on a New Layer, but the Normal Blending Mode just doesn’t look right. By toggling thru the various different Photoshop Blending Modes, my art takes on a different look. To utilize this function, first select the Move Tool (first one on the Photoshop Toolbar), then press the Shift and + (plus) key to toggle through all of the different blending modes. You can also use the Shift and – (minus) key to reverse the order.

There are many shortcut keys preassigned in Photoshop. You can do a quick search on the internet to find a list. In Adobe Photoshop you can also go to Edit>Assign Shortcut Keys to view or change any shortcut key. It is one of those administrative tasks that does pay off with saving time during the editing stage of your images.

Happy Editing!

More of my work can be viewed on my website, Susan McAnany Photography.


Chromatic Aberration Removal

Sometimes Chromatic Aberration is noticeable on an image and a technique is needed for Chromatic Aberration Removal.  You may be asking what is Chromatic Aberration, so let me explain.  It is often found in images where there is an extreme contrast between the light and dark colors and/or highlight and shadows. The dynamic range and sensors on most cameras  just cannot record the two extremes, thus purple fringing occurs or sometime it comes in the form of green or red contamination on the darker color.

Here is a great technique I stumbled upon today to remove Chromatic Aberration using Photoshop CS5.

Here is one method for removing chromatic aberration:

1) Open the image in Photoshop CS5 and copy the Background Layer (CMD-J).

2)  Go to Filter > Blur > Gaussian Blur.  You can experiment with the amount of pixels here, but I had good luck using 15 pixels.

3)  Change the Blend Mode on the Layer to Color.

4)  Add a Mask to the Layer and then invert the Mask.  (CMD-I)

5) Paint with White to areas where you want to remove the CA. If you apply too much, change to Black and paint to remove.  Also, using the Opacity slider on the brush will help  control the intensity of the filter.

I also read  Lightroom 4 has a great tool to remove CA. I guess I will put that piece of software on my Wish List.

The more I learn about photography,  Photoshop and art the more I find I need and want to learn.

Happy Post Processing!

Visit my website, Susan McAnany Photograpy, to view my work.

Just a quick update to this post. I have used this technique also with Photoshop CS6.