Creating borders around images can do a lot to enhance an image and make it stand out. This is especially important for viewing on the web whether you have your own website or using Pinterest, facebook or other social media outlets or image sharing sites. It can be a simple as putting black borders around an image or something a bit more complex with multiple borders and simulating a frame. Below are three quick steps to putting a border around your image using Photoshop CS6.
Creating Image Borders
1) Give some thought to the final size you would like your image. Using Pinterest as an example, I know one of their pin sizes is 735 x 735 pixels and pins look good with a 8 to 10 pixel border. For this example I will use a 10 pixel border in black.
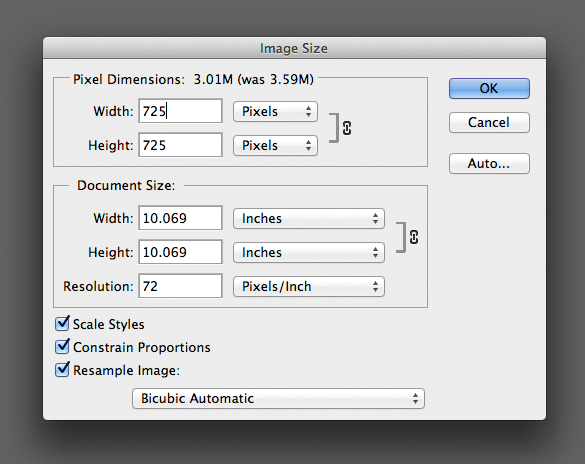
Image Size Screen in Photoshop CS6
2) Open the image in CS6 and go to Image > Image Size and resize the image to 725 x 725 pixels x 72 pixels.If your image is not square format, you could use the Crop Tool and crop an interesting portion of the image and link the Pin to your posted image. If you use the crop tool, be sure to click the Option to Delete cropped pixels located on the top of your toolbar.

Canvas Size Screen from Photoshop CS6
3) Final step is to go to Image > Canvas Size and expand the Canvas. First make sure Pixels is selected in the drop down menu and enter 10 in the Width and Height. This will change your total image size to 735 x 735 pixels. For the Canvas extension color field use the drop down menu and select Black or one of the other choices of White, Grey. You may also want to select a custom color using Other option and Color Picker to select the color you desire. If the Canvas extension color option is dimmed and you are unable to make a selection your Layer is probably not locked. The canvas extension will appear transparent after accepted. Just add a blank Layer and fill that layer with whatever color you want for your border. Either way works beautiful and creating borders around your images gives you a great tool for finishing off your images.
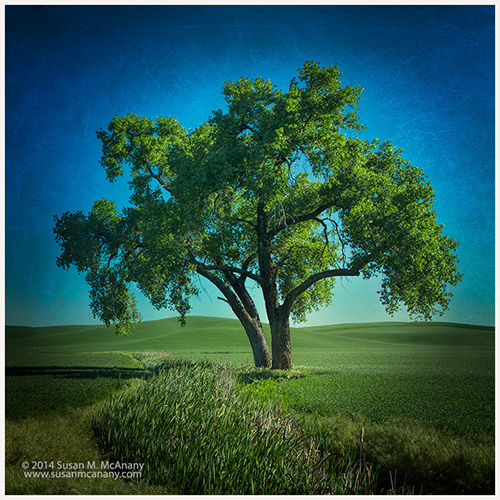
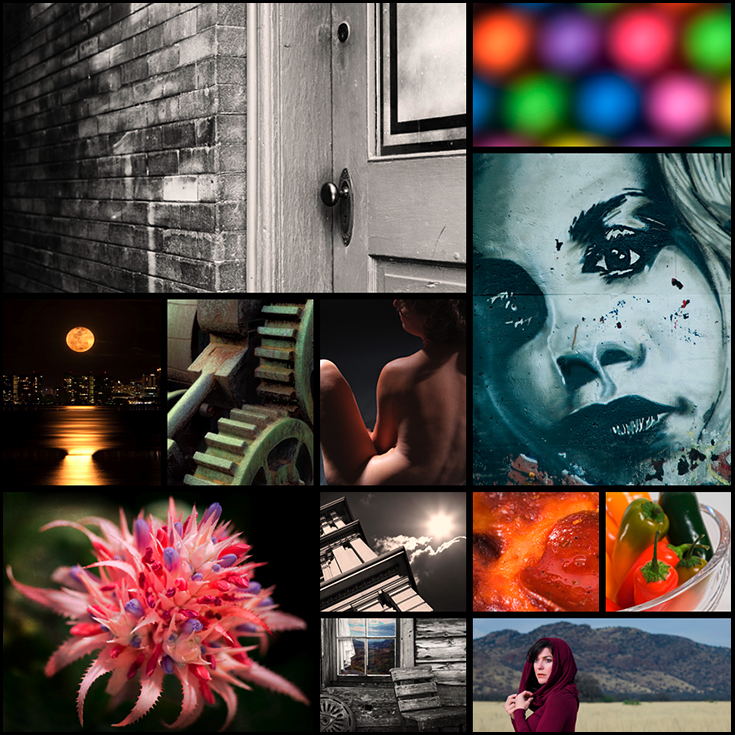
Here is an example of a pin I created using the above three simple steps.
Thanks for reading and more of my work can be viewed on www.susanmcanany.com.
Follow me on twitter: @susanmcanany