Robert Capa Quote

“If your pictures aren’t good enough, your not close enough.”

Robert Capa

I have tried to shoot with that in mind for all of my photography career.  When I saw that quote by Robert Capa, it reminded me once again to fill the frame with your subject. If you can’t fill the frame, then crop it so there is no doubt what the subject is and the story your photo is telling.

Robert Capa, a combat war photo journalist, did just that when he traveled to countless war zones in the 1930s and 40s. From the Spanish Civil war in 1936 to Vietnam war in 1954 (French). Born Endre Ernő Friedmann, in Budapest, Austria-Hungary of Jewish descent. He was studying in Berlin in 1933 when the rise of Nazism broke out. He then migrated to Paris and at the start of World War II, he moved to New York during the height of Jewish persecution. Along the way, he changed his name to Robert Capa and became an American citizen in 1946.

He is know for toting a small camera that would allow him to develop intimate, personal relationships with people and thus powerful images. His work is considered a turning point for photojournalism and war coverage.

Later he embraced 35 mm movie cameras and was involved in several projects, including one with Humphrey Bogert and Truman Capote.

In 1947, he co-founded Magnum Photos with Henry Cartier-Bresson, along with others. Magnum photos is a cooperative photo agency that manages the works of free-lance photographers to international publications. In 1952, he served as President Magnum Photos.

He was killed in 1954 when he stepped on a landmine in Vietnam. He was there for LIFE magazine to photograph the French war in Indochina. He was 41 years old.

What an incredible life and contribution he has made to the photography field, especially combat field coverage. For more information on Robert Capa, check out his Wikipedia page and ICP page.

Thanks for visiting and keep shooting!


Hummingbirds Left the Nest

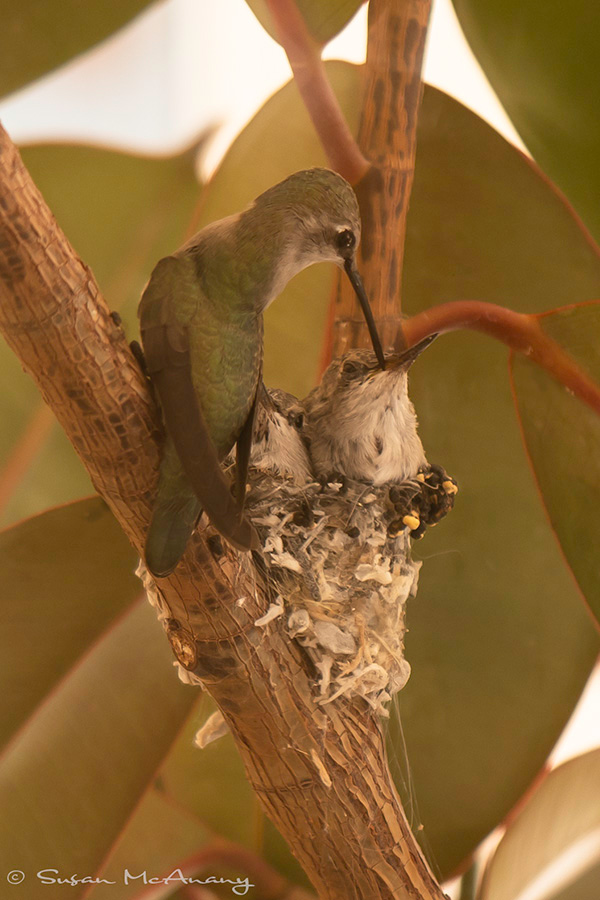
The hummingbirds have left the nest. Actually, it was more like they got so big one fell out of the nest making room for the other one to linger awhile. If you have ever seen a hummingbird nest, you will immediately notice it is very, very small, so I was wondering how long they both would fit. The first one that left stuck around for awhile, fluttering in the plant getting her wings in shape. Momma continued to come to her and feed her as she was perched on a branch.  After a couple of days of flying between two large plants on the patio she took flight. I believe she came to the feeder for a couple of days, but then Momma would chase her off like she did with any other hummingbird that approached the feeder. These birds are very territorial.

The other hummingbird had the nest to itself for a few hours and then it took flight. It made one stop on a ledge and then off it went into the wilds.

Now that the hummingbirds have left the nest, I have to admit I miss the little birds. However, I am happy they both grew up healthy enough so they were able to successfully leave the nest.  I wish them the best and who knows maybe they will visit again next year!

Hummingbird in Plant on Patio 

Momma Hummingbird Feeds Her Chick

Thanks for visiting. More of my work can be viewed at susanmcanany.com. Prints, downloads and notecards are available at my Etsy shop. 


Hummingbirds Part 2

This is part 2 of the hummingbird story. The chicks are growing daily and ready to launch. I have been able to photograph them mostly through a window, which is not the best circumstances. However, if I get too close to them in the out doors, the chicks get very low in the nest and momma circles around. I really do not want to cause any undue stress for the tiny birds. They have a tough life ahead of them and a lifespan of only five years. Interesting, the rate of survival of the baby chick hummingbirds is only around 40%. We will be lucky if they launch safely.

Momma visits the nest many times each hour during the day but she is no longer sleeping on the nest. Mostly, her life consists of visiting the feeder, feeding the babes and returning to a hedge where she has a great vantage point. Here is a shot I took of her visiting the nest. The camera was on a tripod and I used a remote shutter release. Also, I set the shutter speed to as fast as possible, since she is a very speedy. Additionally, the raw file was cropped in photoshop and boy am I happy for the 60 megapixel raw file to work with!

Wild Hummingbird Feeds Her Chicks

Female hummingbird feeding her chicks.

The feeder is attracting a lot of hummingbirds, but Momma bird is very territorial of the feeder and the food, running off any other hummingbird. Hummingbird food consists of sugar water and the recipe is very easy.  Bring 1/4 cup sugar and 1 cup of water a boil to melt the sugar, then let the mixture cool before putting in the feeder. Apparently, as soon as the a hummingbird beak reaches the sugar water it is contaminated, so no need to boil for any length of time.

Check out the video of her chasing off other birds

Thanks for stopping by and checking out what is happening with the hummingbirds in my backyard. This has been so much fun learning about and watching these little guys! I hope you have something in your world that brings you joy.

My of my work can be viewed on my website or at my Etsy Shop or Saatchiart Studio!

Hummingbird Nest and Chicks

Around the end of January,  a momma hummingbird made her nest in a potted plant I had growing on the patio. That began our hummingbird experience.

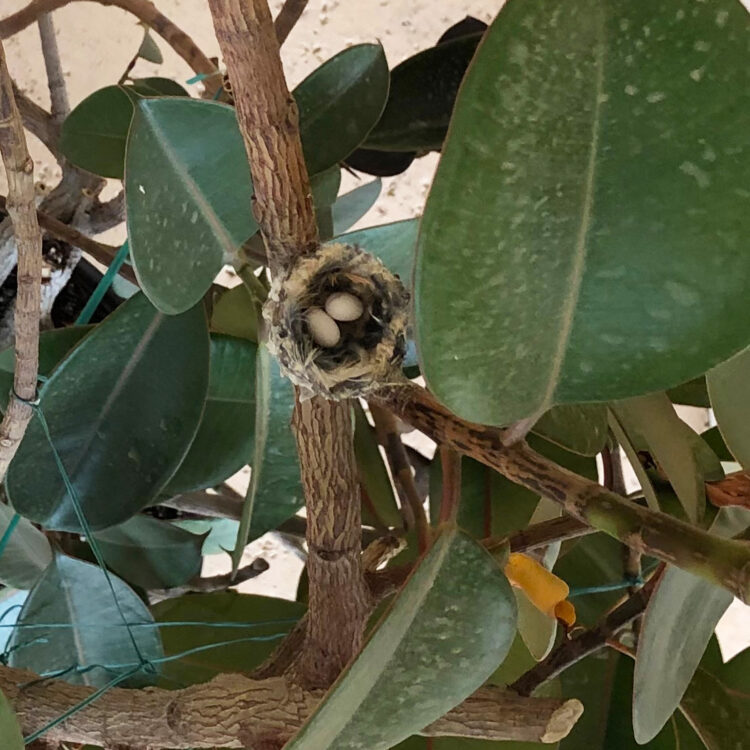
A hummingbird nest is around 2 in by 2 in, so we lucked out when my partner even spotted it. A selfie stick was used to capture the inside of the nest, where the eggs are about the size of jelly beans.

Hummingbird Nest and Eggs


From that point it was a waiting game. We watch,  as the momma hummingbird would sit on her nest and keep the eggs warm. Two to three weeks later the eggs hatch and we had two hatchlings.

As you can imagine, the hummingbird hatchlings were so small in the nest, the chicks were barely visible in any photos. Any decent photo would have required artificial lighting and we did not want to disturb the chicks nature in action.  One thing I did do was purchase a feeder and make food so momma hummingbird would have enough substance to keep her babies alive.

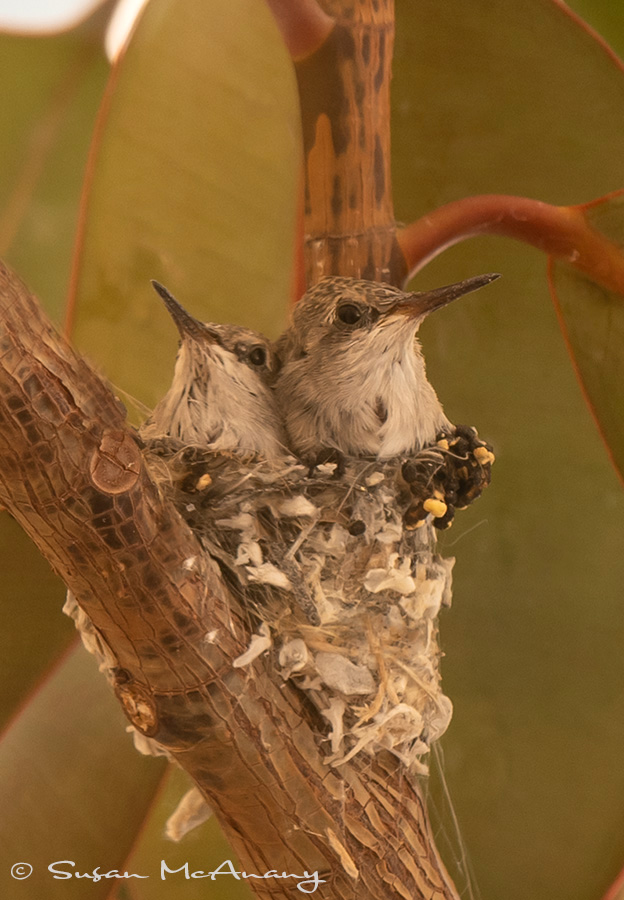
It took another two to three weeks for the chicks to get large enough to get a decent photo. They actually started to get so big, I am amazed they still fit in the nest.

Two hummingbird chicks in nest.

Hummingbird Chicks in Nest.

We have endless hours of interest and enjoyment watching the hummingbirds grow and the      Momma tend to her babes and protect her feeder from other hummingbirds. I look forward to see what happens when they leave the nest. I will keep you posted.

Thanks for stopping by. More of my work can be viewed at susanmcanany.com or at my Etsy or Saatchiart studios.


New York City and ICM

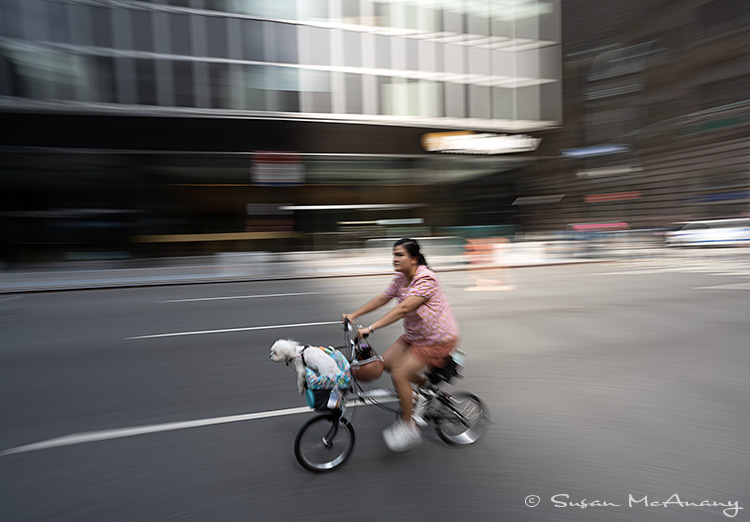
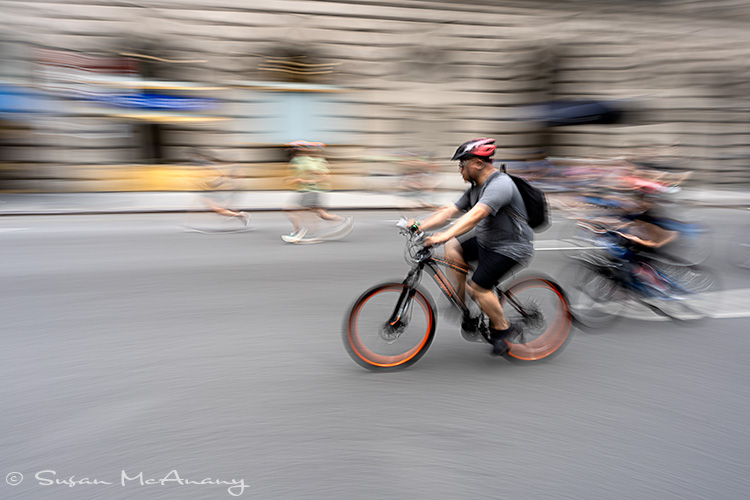
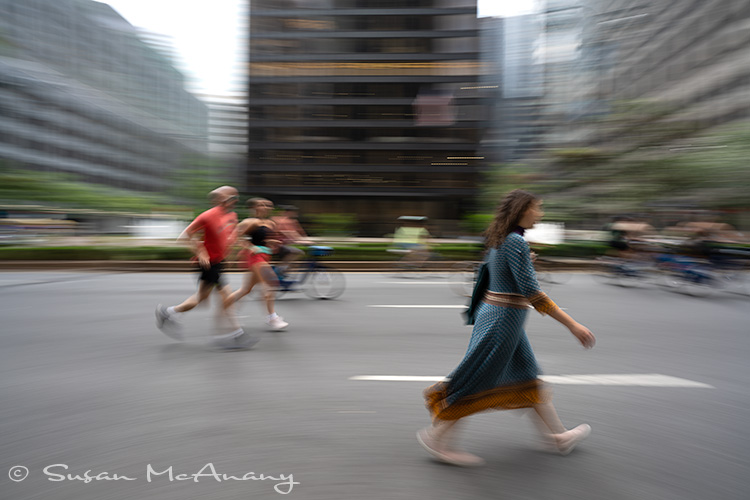
On my last visit to NYC I took to the streets to try some ICM techniques. 

There are so many fabulous things about New York City. If you have ever been, I’m sure you will agree.  The food is outstanding, the buildings are big and interesting and the quantity and quality of entertainment is found no where else in the world.  But another great aspect of NYC is all the people. They come in all shapes, sizes, nationalities and generally pretty darn friendly for a big city. 

I’ve been lucky to visit NYC several years in the summer and I always like to stay over for a Saturday. On Saturday mornings the city hosts Summer Streets, which is a pedestrian friendly event. They close miles of a major city street all traffic lanes and open it to pedestrians to walk, ride, skateboard, roller-skate. Any activity that keeps you moving. And along the way they have music and food venues.

I always like these Saturday mornings and on my last visit I took to a closed Park Avenue to try some ICM techniques with the all the people in motion.

For all of these images, the blur was done in camera with a low ISO (ISO 50) and slow shutter speed (1/4 TO 1/20). The aperture will vary depending on the amount of light. At times, I had a 3 stop Neutral Density filter on. A slight horizontal movement was made with the camera. For these images the movement was horizontal. The technique requires a lot of snaps to get a keeper and I still need a lot of practice.

ICM Images

Post Processing

I use Bridge, Camera Raw and Photoshop as my primary post processing software. I know many people use Lightroom and I am sure you can do many of the same operations in Lightroom.

From Bridge,  I take the Raw image into Camera Raw and make my usual edits.

Next, I open in Photoshop and copy my Background Layer. I then review the image and fix anything that needs fixing. This could be a sensor spot cleanup or cropping of image.

If needed, I add a Levels or Curve Layer to adjust the dark and light areas of the image.

Next, I merge the Layers by selected all layers, holding down the alt/option key and going to Layers > Merge Visible. This will create another Layer on top of your other Layers. This layer will contain all of the edits previously performed, however, you will no longer be able to edit the layers below the merged layer. Unless of course you delete the merged layer, then you still have access to all your work. I recommend you immediately rename this layer. It can get confusing.

From here, I applied a High Pass Filter to the merged layer (Filter>Other>High Pass). For these images, I used a Radius of 12. Don’t be alarmed when your layer turns gray. Just change the Layer Type in the Layers Palette from Normal to Overlay or any of the other types that look interesting to you. 

The High Pass Filter is a form of sharpening filter. If you don’t want the filter effect on the whole image, convert the merged layer to a Smart Object (Layer>Smart Object>Convert to Smart Object), apply the High Pass Filter to the Smart Object Layer, add and invert the mask and with a brush apply the sharpening (High Pass Filter) to specific areas.

You can also just take the merged layer of your image into Nik, Topaz or any number of third party pieces of software to obtain any your vision.

I hope you found this interesting info and I thank you for reading!

It is always fun to try new techniques. Keep shooting.

More of my work can be viewed at susanmcanany.com.


Yosemite’s Giant Sequoias in Mariposa Grove

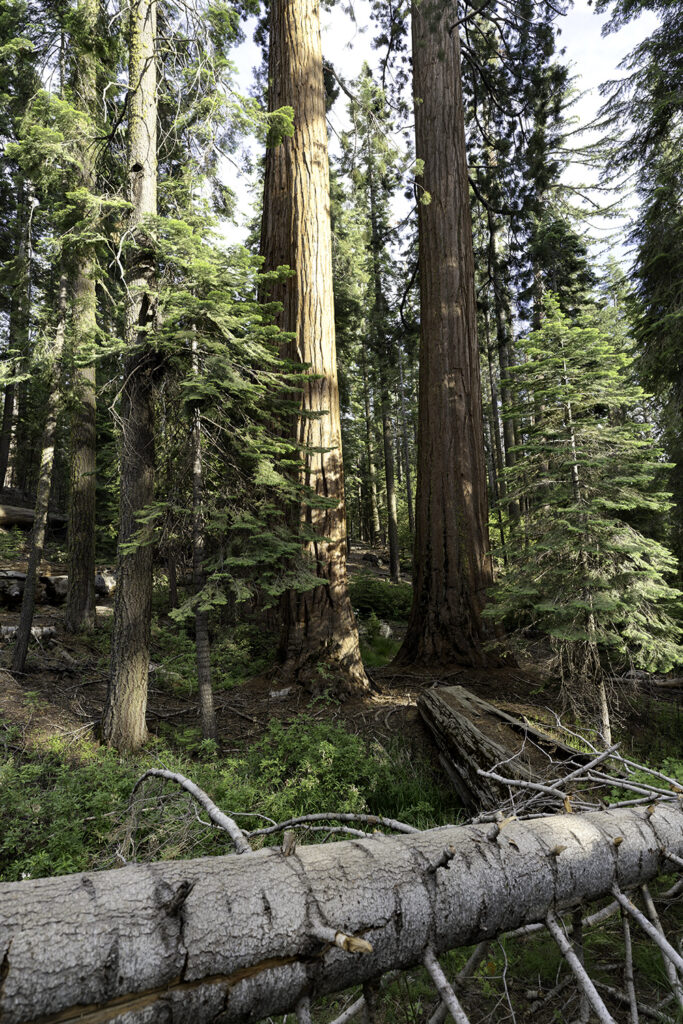
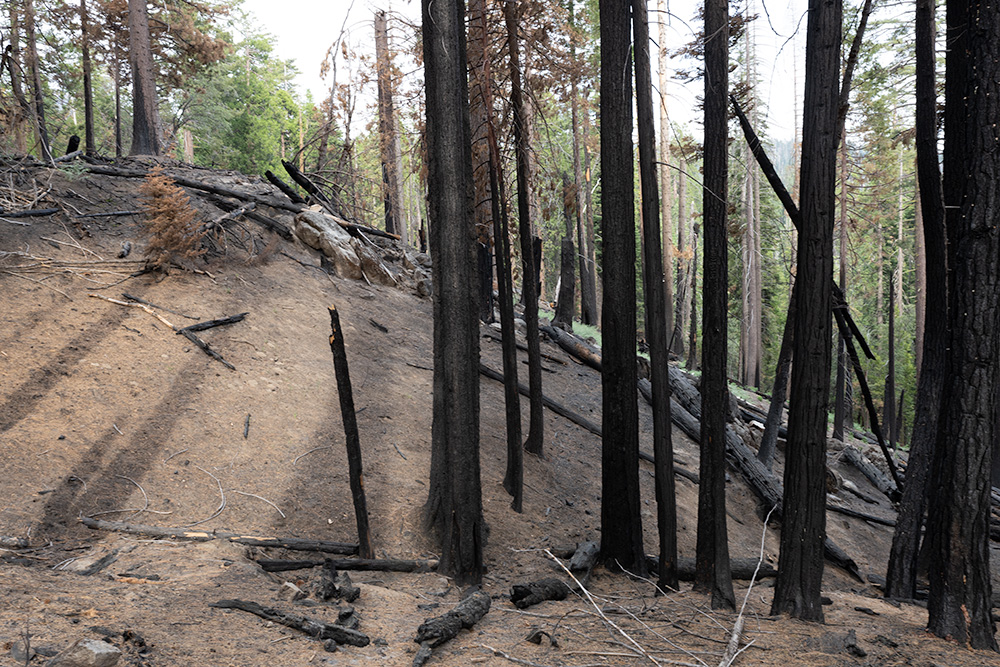
Recently we made a stop to see Yosemite’s Giant Sequoia Trees in the Mariposa Grove. We had really been looking forward to the stop since my partner had never seen the giant Sequoias and I always love a good inspiring walk through the forest. Much to my surprise what we found was anything but inspiring.  We entered the park using the SW entrance via 41 not far from Oakhurst where we were staying. The twenty minute drive to the park was mostly through a graveyard of trees that had been affected by forest fires throughout the years. Several fires have occurred in that area in 1961, 2021, 2022, so the area leading into the park is looking pretty devastated. 

I was hopeful the park would be in better shape.

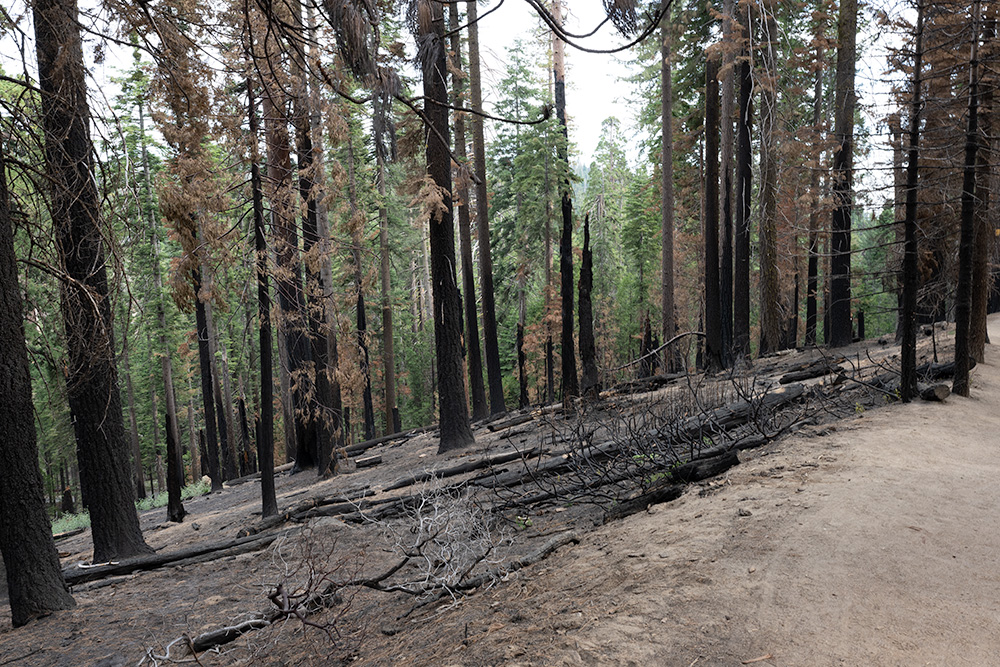
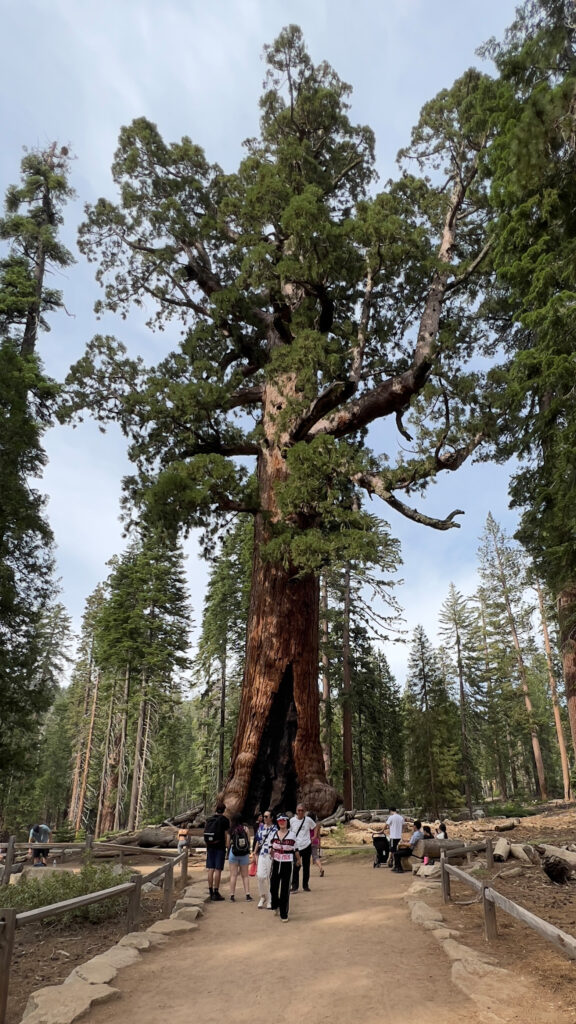
We paid our entrance fees and headed for the short shuttle ride from the parking lot to the Mariposa Grove where the Giant Sequoias live. We started up the path and the further along we went the more disheartened we became. Little did we know the Mariposa Grove had been affected by the Washburn fire 2022. We continued on to the highlight of the the trail, the Grizzly Giant, which is a little over a mile hike. It was a beautiful tree and mostly saved from fire damage. However, if you continue along the trial to the Tunnel Tree and beyond even more devastation can be seen. Here we encountered more charred forest and signs that a “controlled burn” had taken place.  It was the most depressing walk through the woods I ever took. I write this today not to bash Yosemite, but hopefully prepare others if they also plan a trip to the see Yosemite’s Giant Sequoia Trees in Mariposa Grove.

One last thing, be aware the crowds and wait is huge in the summer so bring plenty of beverages for the trip!

Normal area of Mariposa Grove.

Burned area of Mariposa Grove.

Burned area of Mariposa Grove.

Grizzly Giant Sequoia Tree

Thanks for stopping by. More of my work can be viewed at my website.

Spring in the Desert

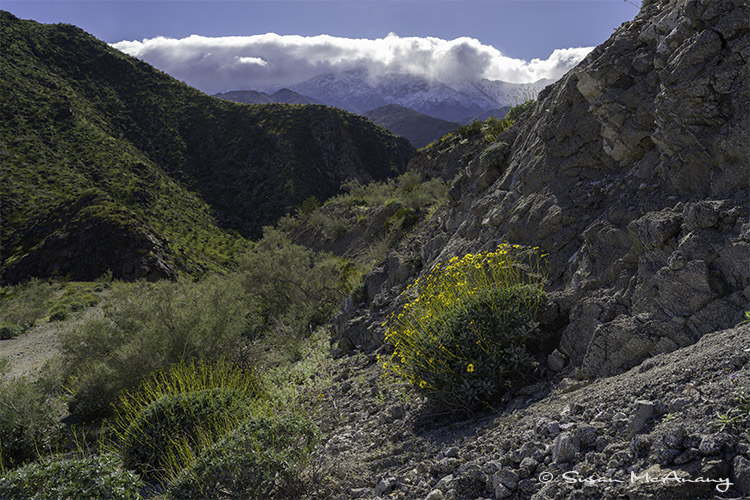
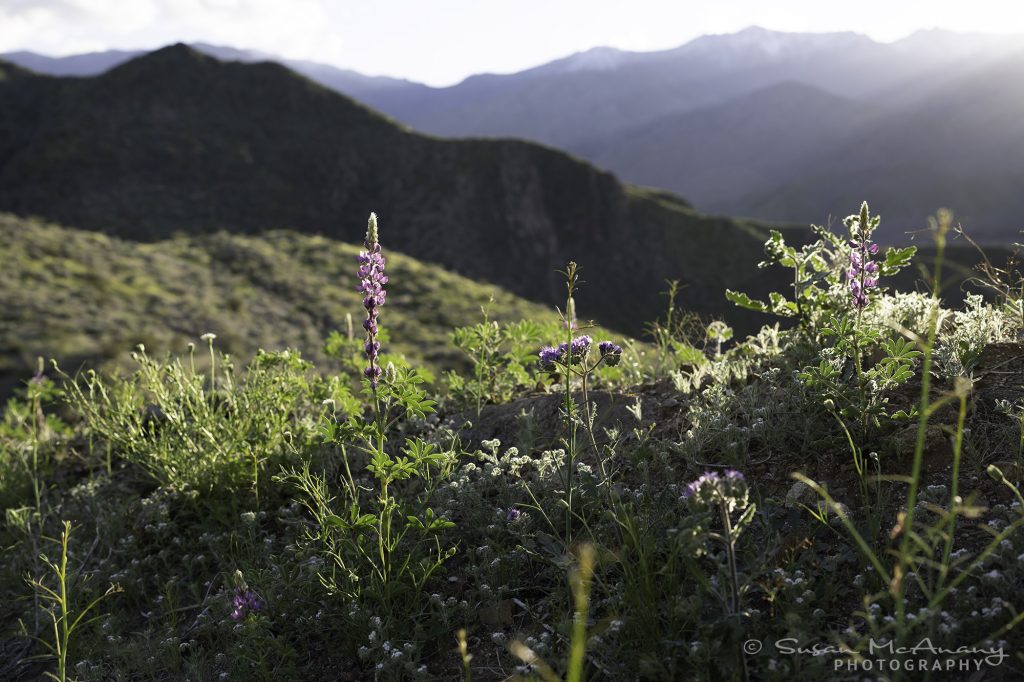
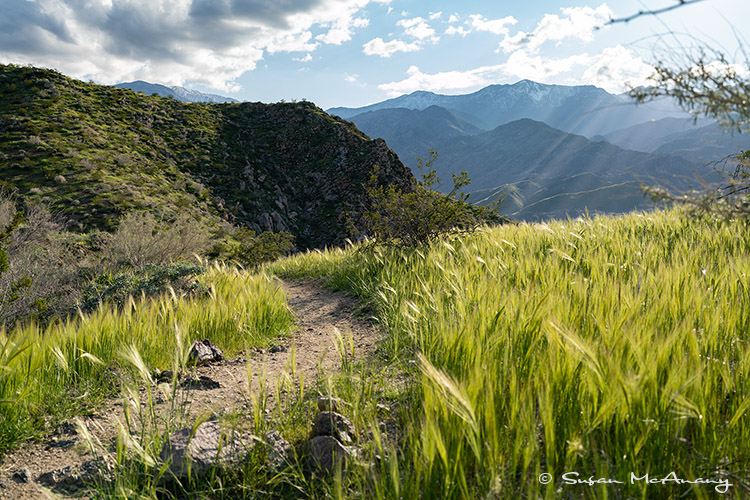
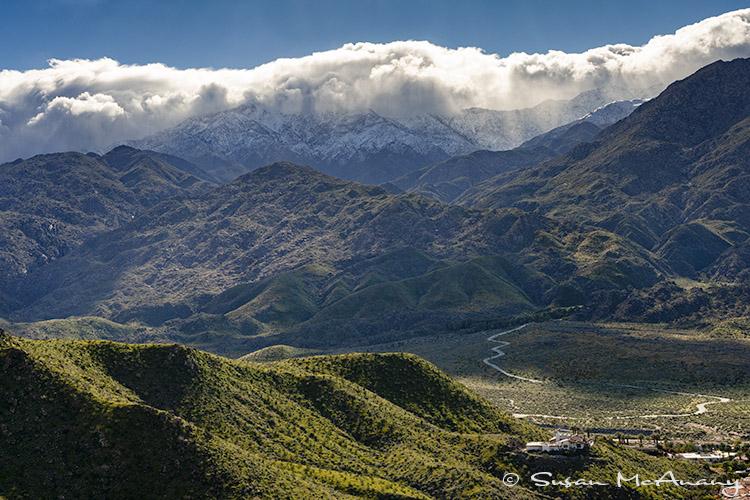
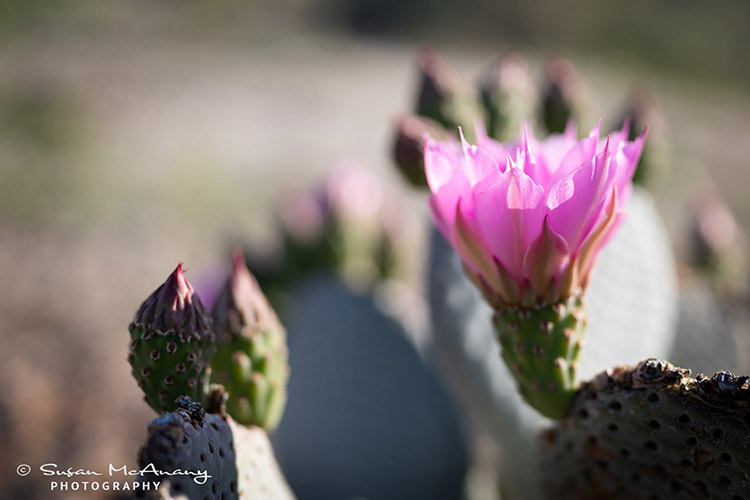
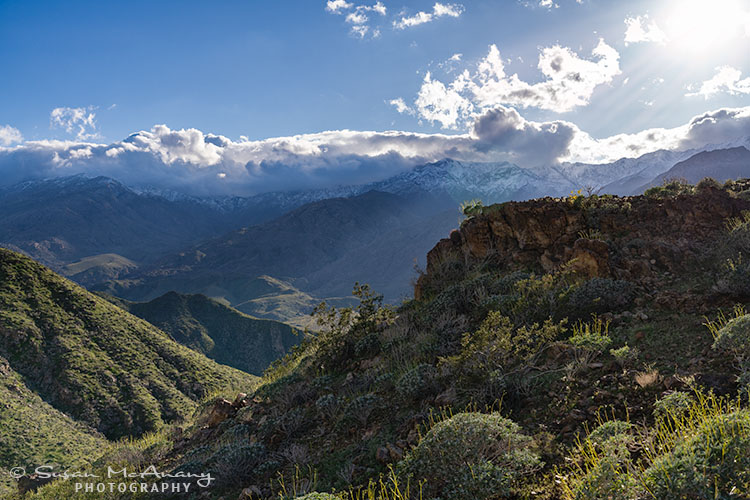
When spring in the southwest desert is rainy, it truly makes for great weather with clear skies and oh so green mountain sides with lots of wildflowers blooms. Compared to Florida, the rain showers are minimal, often an inch or less in the valley. However, the mountains get a lot more rain and snow as beautiful clouds make their way north east.

I believe this is the first spring in several years the desert received such plentiful rains and we all know how much the southwest needs it. The catch phrase around here is “nature threw us a lifeline” and everyone is grateful for it. The reservoir is full again and everyone is breathing a sigh of relief.

I am fortunate to live close to hiking trails and made plenty use of them hiking several times a week. Much of the time the iPhone is my camera of choice, but, a few times I took my “big girl” Sony camera with me and happy I did. It was well worth toting it the distance and elevation to some of my favorite spots. Actually, it was truly a spiritual experience seeing and capturing the transformation of nature before my very eyes. I have hiked the Bogert Trail in Palm Springs many times, but the visual of the green was magical.

When viewing the images below, try to visualize the landscape in multi shades of tan, brown and gray and maybe you will have a spiritual experience also.

Images from the Trail

Wild Flower Bloom In the Rocks

Spring in the Desert

Sea of Green

Spiritual 

My Time

My Happy Place

The weather is beginning to warm and many of the wildflowers are still holding on, but the grasses are turning brown. I know what the future holds for them as summer weather approaches with it’s 100 plus degree temperatures. For now, I’ll savor the beautiful spring in the desert that I am lucky to experience.

Hey, thanks for stopping by and taking a look. View more of my work on my website or at Saatchi Art.

ICM with the iPhone

Recently I have been experimenting with ICM with the iPhone.  First, let’s clarify that ICM is an acronym for Intentional Camera Movement. It’s a new technique that has been getting a lot of traction lately. It is fun to create ICM images and is one tool for me that stimulate creativity.  I have shot ICM images with my Sony mirrorless and recently came across an app for the iPhone that will allow ICM with the iPhone. 

Like many, I sometimes want to take photos without the weight of my big girl camera, even though my Sony camera is much lighter and smaller than the Canon DSLRs I used for decades. The iPhone has just tremendous capabilities in a smaller package and my iPhone 13 has a pretty great camera also!  I am sure Windows and Android based phones are equally as powerful; I am just not familiar with them.

The App that will allow you to create ICM images with the iPhone is Slow Shutter and available at the Apple App Store. It’s a fun app with a lot of flexibility in the preferences.

The preferences permit you to select the photo resolution, aspect ratio and file format. There are options in the Capture Mode for Motion Blur, Light Trail and Low Light also. The images below were generated using the Motion Blur Capture Mode with a 4 second Shutter Speed and a Low Blur Strength.  I use the greatest photo resolution allowed 12 mp, the 4:3 aspect ratio and a tiff file format.

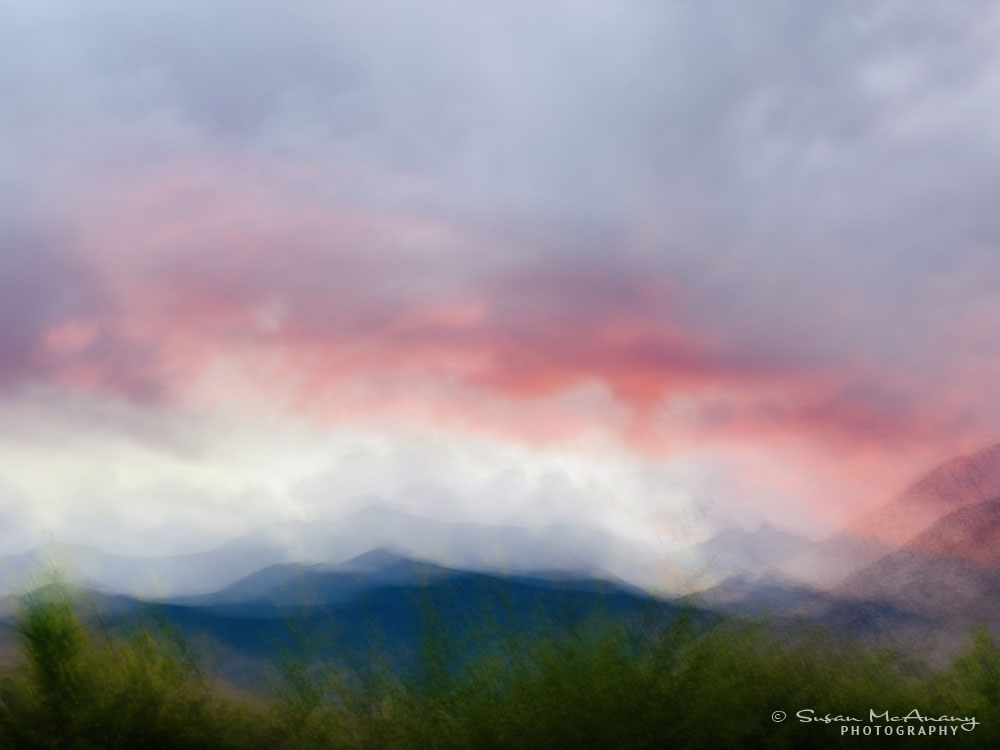
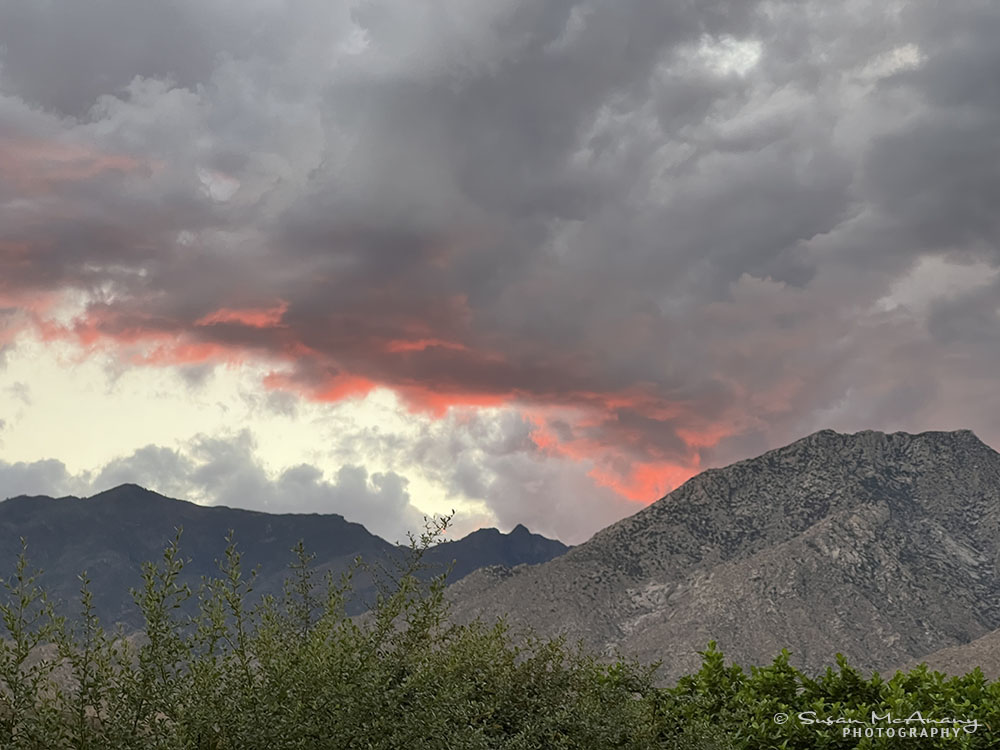
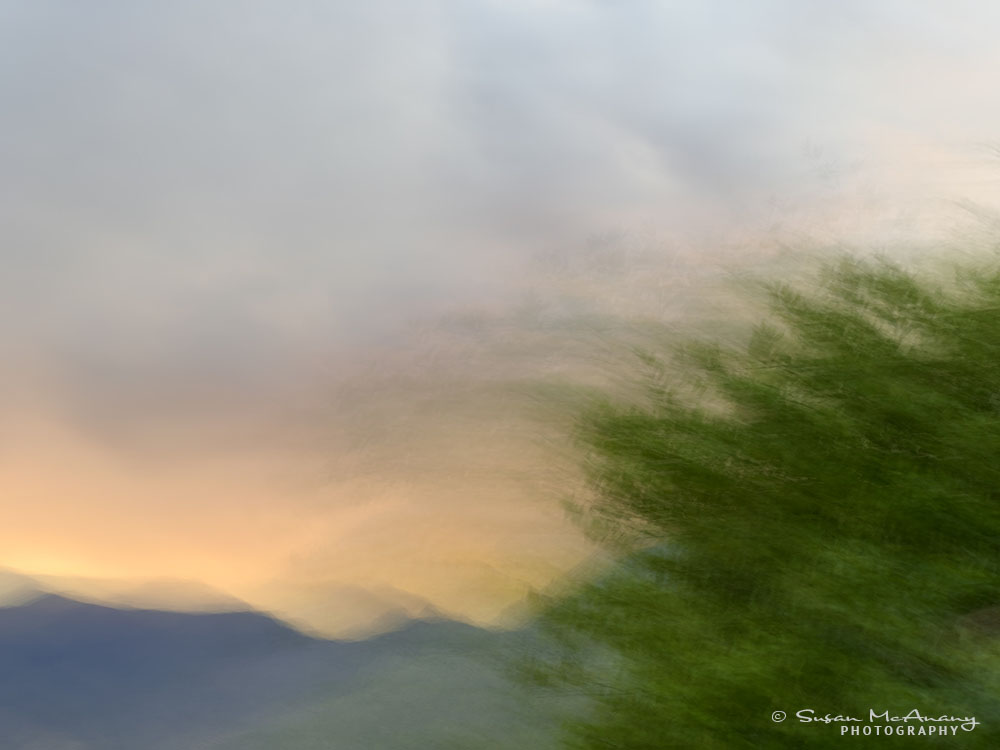
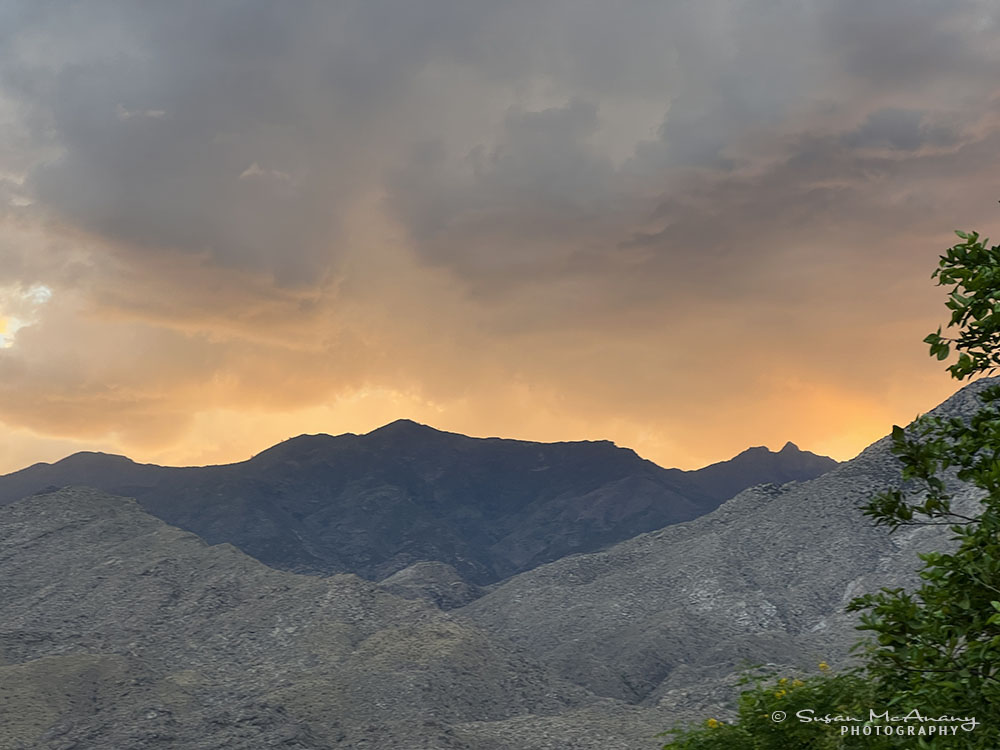
Below are examples of images taken using the Slow Shutter app and the same scene shot traditionally.

ICM Image

Traditional Shot

ICM Image

Traditional Image

As you can see, the app changes the scene dramatically sparking some creative juices. For tips on creating an interesting ICM image, check out my blog post here.  I find shooting ICM images with the iPhone truly fun and we all need a little more fun in our lives! I hope you give it a try.

Thanks for stopping by and more of my work can be viewed at https://susanmcanany.com

Saint Nicholas Day

I was out with friends recently and we chatted about Christmas stocking. It brought back a memory of Saint Nicholas Day from my childhood. Funny, I had not thought about this holiday in decades, but I can vividly remember the thrill and excitement of hanging my stocking along with my siblings one evening in early December.  Even more exciting was waking in the morning and having the stocking filled with candies and small trinkets, especially since December 6 usually happened on a school day.

Being a lapsed Catholic, I did a little research to refresh my memory about Saint Nicholas.

Saint Nicholas was truly the first Santa Claus and he was a real person living around 300 AD. Orphaned as a child by the death of his parents in Turkey, he was raised by Christians and dedicated his life to service, giving anonymously to the poor and children. He became a bishop in the late third century, recognized as a saint in the 800s and Catholics in France began celebrating Bishop Nicholas Day in the 1200s.

Europeans were the first to celebrate St. Nicholas as the Feast of SinterKlaas on December 5. Children would put out shoes with treats for the saint’s horses in hopes of receiving candies and gifts. Also this date would correspond with the beginning of Advent, a Catholic tradition. 

Most of the previous information came back to me while I was reading a couple of articles, but one new tidbit emerged about the symbolism of the candy cane.  Apparently it represents St Nicholas staff and was left in the shoes of children, along with candy and toys to decorate their Christmas tree. I don’t remember ever hearing that before and find in quite interesting.  More info about the tradition and lore of St Nicholas can be found here

Lastly, I want to wish everyone a very joyous holiday season and peace, prosperity and creativity in the coming New Year. May your stockings be overflowing!

Green, white and red decorated Christmas stocking

My work can be viewed on my website.