Author Archives: Susan

Night Photography Tips

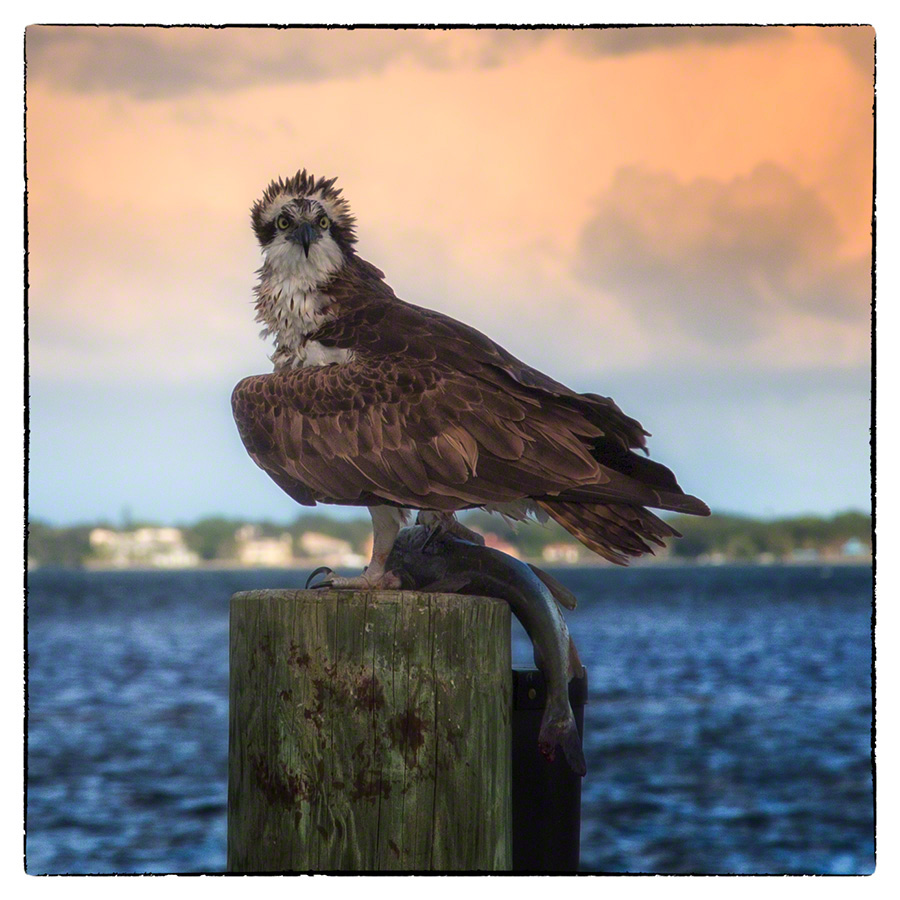
Night photography is always fun and can produce exciting images especially when there are some stunning lights or fireworks to capture. I was fortunate the other evening to notice some awesome lights being reflected on Sarasota Bay very close to where I live. So close actually, I was out there shooting the skyline in my bathrobe.  Now that alone would of been a great photograph! I have seen the water very still before and some nice reflections, but never such vibrant lights being reflected. Overall, the air and water temperatures were on the cooler to cold side so maybe that contributed to the colorful reflections. It truly was magical, so I grabbed my camera and tripod and got to work doing night photography.

Night Photography Tips

  1. Pump up your ISO. I used 400 for the photo below. Unfortunately, with anything much higher than ISO 400 combined with the low light conditions of night photography you may see a lot of noise.
  2. A tripod is a must or something very sturdy to support your camera.
  3. Use Manual Mode on your camera. This will allow you to adjust independently your Aperture and Shutter Speed.
  4. Keep your Aperture as wide as you can. If the distance between your camera and subject matter is great as in the image below, f4.5 to f5.6 will work just fine, producing sharp in focus images.
  5. You will also have to open up your Shutter to allow more light. On the camera’s meter my image was a good 1-2 stops underexposed.
  6. A remote shutter release is recommended or you can also use the timer on your camera.
  7. Take lots of snaps at various Aperture and Shutter speeds and be sure to bracket, bracket, bracket.  Experimenting and practice is the best teacher for night photography along with photography in general.
  8. Remember to bring a flashlight.  This believe me is a critical tool for doing night photography.

“Night Lights”

Night photography of Sarasota Skyline

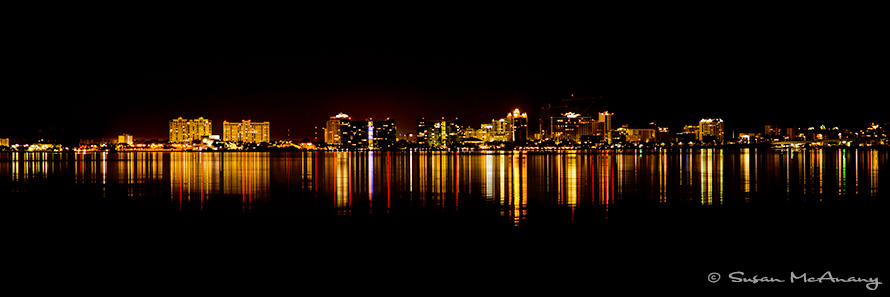
Sarasota skyline at night.

Well, I hope these night photography tips have been helpful. Now go have some fun shooting your local skyline or any other interesting lights in your neighborhood or city.

If interested in night photography, you may enjoy this post on shooting lightning strikes.

Thanks for reading and more of my work can be viewed at www.susanmcanany.com.

Copyright Symbol Tips ©

I probably use the copyright symbol ©  daily as I prepare images for the web. Not only does it make me feel as though the image is somewhat protected, I think it looks kind of cool on the image. It is so incredibly easy to do and I encourage you to put your name along with the copyright symbol on your work also.  Some people suggest the date should also be included along with the symbol. I think for commercial work this is incredibly important. For my fine art work, I find it to be a bit intrusive. I do of course complete the metadata file with the copyright symbol,  date, and also with the phrase:  All Rights Are Reserved for any images I post to the web.

Creating the Copyright Symbol

On a Mac: press alt/g

On a PC: Press the Alt key/key in 0169 on numeric keypad

Here are a couple of images with the copyright symbol on them. I created the symbol and text in Photoshop using the text tool. Once I knew my standard image size, it was easy to create an Action in Photoshop to generate the the copyright symbol along with any text, font size and color you may want to add.  With the addition of a Photoshop Action placing the necessary symbol and text on your images is now an extremely quick and easy task.  Another important step to protecting your work is to consider registering your images with the Copyright Office in Washington DC. Over the years this process has become quite easy also especially since currently it can be done all on line.

rustic farmhouse sepia toned print with copyright symbol

“Desperation” © Susan McAnany – All Rights Are Reserved


Pepper kitchen art print with copyright symbol

“Pepper Line” © 2007  Susan McAnany – All Rights Are Reserved


Thanks for reading and if you have time, check out more of my work at susanmcanany.com

2016 Motto

As the new year rolls in, I’m inspired to come up with a 2016 Motto versus a New Year’s resolution this year.  The problem with New Year’s resolutions is they are often forgotten by the end of January. I know I am guilty of that and I am sure many of you are too.  I am at a funny stage in my work, eager to branch into something new and exciting yet waiting for a few personal things to happen so I can move forward. But yet, I still have my camera, my eyes, my creativity and two strong legs to get me around. So as I look at my situation and my creative desires that need fulfilling.  I am making a commitment to the following 2016 Motto:

  “Strive to capture the extraordinary in the ordinary!”

I tend to to this anyway as evident in my Misconceptions Project.  To this day that work still inspires me and I am always on the look out for new and exciting ideas.  Finding words that pinpoint my 2016 Motto has helped me craft a vision for my work or maybe in my case renew my vision. Throughout my life and creative development I have found re-accessing a couple of times a year is always helpful.  Also good is to reflect and think about the things that have worked and not worked over the past 6 or 12 months. I probably should be doing that every 3 months to be perfectly honest. I guess as another inspired person once said, “Life is a evolution, not a revolution”.

Here are a couple of prints illustration my 2016 Motto “Strive to capture the extraordinary in the ordinary”:
2016 motto circular abstract art print

“Obsessive ” © Susan McAnany


Colorful condoms fine art print 2016 motto

“Security Force” © Susan McAnany

Thanks for visiting and check out more of my work at susanmcanany.com

Holiday Wishes

My holiday wishes for you are moments of sheer joy, feelings of peace and security in your everyday life, gratefulness for all that you have and don’t have.  Below are a couple of favorite poems, one for dreaming, the other for pondering. Maybe next year I will write a few of my own. Writing does seem to pair well with photography and also helps juice the creative flow!  Thanks for visiting and my holiday wishes for you extend into the New Year. May it be a wonderful one for you and your loved ones!

holiday wishes and decorations

© Susan McAnany

Holiday Wishes

We wish for you a holiday
That’s better than your dreams,
Filled with peace, good will and hope
And firelight that gleams,

Overflowing with holiday spirit
Good food and holiday laughter;
And when it’s done, We hope that you
Live happily ever after!

By Joanna Fuchs


Mistletoe

Sitting under the mistletoe
(Pale-green, fairy mistletoe),
One last candle burning low,
All the sleepy dancers gone,
Just one candle burning on,
Shadows lurking everywhere:
Some one came, and kissed me there.

Tired I was; my head would go
Nodding under the mistletoe
(Pale-green, fairy mistletoe),
No footsteps came, no voice, but only,
Just as I sat there, sleepy, lonely,
Stooped in the still and shadowy air
Lips unseen – and kissed me there.

By Walter De La Mare

Happy Holidays From My Studio To You!!


PNC Corporate Collection

So thrilled that three of my prints have been selected for inclusion in PNC Corporate Collection.  Further editions from these three great series are available by contacting me through my website.  I know all of them will look great hanging in their new corporate building and I am so thankful to be included.

“Abstract Triangle” and “Abstract Vertical” were shot in studio where I focused on lines and color to create modern contemporary abstract series out of pieces of vintage chalk.  I totally enjoyed that process.  “Peaceful Coconut” was shot on location after a huge Florida tropical storm and I came across a green coconut. I was attracted to the way the coconut survived barely scathed after high winds, rain and a huge fall from probably 50 feet. It truly gave me  a wonderous moment of appreciation for nature.

All three of the prints are some of my favorites and I am so pleased to be included in PNC’s Corporate Collection.  Thank you!!

Title: “Abstract Triangle”

abstract art print in corporate collection

Title “Abstract Vertical”

Abstract art print purchased for corporated collection

Title: “Peaceful Coconut”

coconut print in corporate collection


Thanks for taking a look and more of my work can be viewed on my website.

Osprey – An Awesome Nature Moment

Sometimes nature just provides an awesome moment that reminds me just how small we are in this big universe and how important it is to live in the state of awareness. I was lucky to spot this Osprey perched on a piling one evening right around dinner time. He has visited before but never with a big fish. It was truly awesome to observe and listen for awhile as I took a few snaps and did a lot of admiring.  This awesome nature moment  got me wondering about this Osprey and the life it lived.

“Dinner Guest”

osprey with fish on pilingFacts About Ospreys

The Osprey live on the water or very close by so they have access to fishing.

They are great anglers and can catch fish up to three or four times a day.

They live approximately 20 years and their wingspan is often five to six foot.

Female Osprey are slightly larger than males.

They  migrate as individuals from areas in the north to South America every year during the winter months.

In the spring, on their northern migration, they return to same nest and the same Osprey mate. They mate for life to breed.

Once they leave the nest for migration, they leave their chicks behind and will never see them again.

You can see their large nest made of sticks on high poles, often electrical poles.

Although Osprey were not impacted by the pesticide toxins of the 1950s and 60s, they do experience quite a bit of danger during their long migration from north to south and vice versa. They have to fish along the way and if weather is treacherous they can be blown off course causing great delays and possible navigation issues.

Now that you know some facts about Ospreys, I hope you are lucky to have some awesome nature moments.

Thanks for visiting and more of my work can be viewed at www.susanmcanany.com.

Abstract Photography Techniques

Here lately I have been experimenting quite a bite with abstract photography techniques to create a new series of prints. I am fortunate to live in a beautiful place surrounded by water and I wanted to create a series of images that capture the beauty and tranquility of the Gulf of Mexico and Sarasota Bay. There is also a certain amount of uniformity and monotony in the landscape of a state that is at sea level, however, I have notice the water color changes throughout the day as the sun progress through the sky and the color of light changes. It is very interesting to observe and has provided me with a new appreciation for where I live. Using the motion or swipe abstract photography technique, I have been experimenting with capturing the varying colors and consistent vertical and horizontal colors.

This abstract photography technique requires a very slow shutter speed and smooth movement of the camera along a vertical or horizontal plane. Since I am capturing so many horizon lines, I typically shoot on a mono-pod or tripod. If you are not using either, keep your arms tucked in close to your body to provide stability for your camera. Your shutter speed must be slow, typically around 1/10 to 1/20 of a second. I generally use a small aperture to help achieve a slow shutter speed. On some images I have also used a polarizing filter to reduce exposure. Start moving your camera at a slow, but even pace and click the shutter. The important part is to click the shutter after you have started moving.  This abstract photography technique will require a certain amount of experimentation on your part to find the right aperture and shutter speed that works with your subject, but that is all part of the fun.

Here are a couple of examples:

Title: “Seaside”

Abstract Photography Example

abstract photography

Title: “Gulf Waters”

Abstract Photography

The full collection of my water images can be viewed here.

We all love to go somewhere new to become inspired and create new work. Fortunately, I have found being creative with abstract photography techniques has provided the perfect tool to become excited once again with the place I live.

Thanks for reading and more of my work can be viewed on susanmcanany.com or at my Etsy Store.

Pros & Cons of the Canon 5DS R

I just completed a 4 day rental of the new Canon 5DS R that I have been lusting after since it was first announced some six months ago.  My initial impression was it seem lighter than my 5D Mark III which thrilled me. But after checking Canon’s website the difference is so small, I can hardly believe I could notice the difference. The Mark III, body only, weighs in at 30.5 oz.; 5DS R weighs in at 29.80 oz. Initially, I also was not impressed with the sound of the shutter release on the Canon 5DS R. To me it sounded rather plastic-y, however, my partner liked the sound better on the 5DS R than the Mark III so obviously this is just a personal preference.  It certainly wouldn’t deter me from a purchase. Below is a list of the major pros and cons from my experience with the Canon 5DS R.

5DS R Pros

A whooping 50.6 Megapixel file for gi-normous prints and wonderful cropping opportunities.

More sophisticated focusing technology that needs to be fully understood.

Great new Mirror Lock Up options permitting the camera to perform the second click after a designated time, reducing camera shake.

Knobs, dials and menu system quite similar to my Mark III, so operations were easy and transition to the new camera would be a snap.

As with other Canon cameras, image quality was great.

5DS R Cons

Don’t be in a hurry with the Canon 5DR S because those big files take awhile to write to the card in the camera.

Photographer’s technique needs to be close to perfect when shooting.  Any errors are magnified due to the size of the file capture.

Although, I have plenty of storage space on my computer, the processing speed got somewhat bogged down in Photoshop especially when working with 16 bit, Smart Layer files.  I may need to factor in a new computer. Yikes!!

When I look at the images now, I can’t see that great of image quality improvement from my 5D Mark III.   Image size Yes, the files are BIG.  But then any new camera requires a period of adjustment to learn how to get the most from it. I am sure the time I had with this camera was not long enough to get everything out of it that it offers.  The more you use the tool, the better results you will get.  I have owned the Canon 5D, Mark II and Mark III and to this day I think the Canon 5D Mark II produced the best result for me. I know is only because I did a tremendous amount of shooting with that camera in the studio, on location and everywhere else. I knew it like an extension of my body.

In the end though,  I was sorry to pack up the Canon 5DS R camera and send it back to lensrental. Like any good camera junkie, I will probably purchase one sometime in the not too distance future. Who knows, maybe Santa will surprise me.

Thanks for reading and check out my work at www.susanmcanany.com.


Print Size Feature In Photoshop

Ever wonder if the Print Size display feature of Photoshop is accurate in showing you the detail of your image? This Photoshop feature for CS6 is located under View on the top toolbar of Photoshop.

If you have a lot of prints professionally printed like I do or if you print yourself, you want to get as accurate visual of your print as possible prior to sending it off to a printer or printing it yourself. In order to do this you must make sure the resolution of your monitor reflects as accurately as possible the pixels per inch you plan to print. The default is Photoshop is your screen dpi.  We all know printing cost money regardless of how you do it.  Thus when using the Print Size feature in Photoshop you are a little bit closer to viewing the actual output .

After doing some research, here is a quick and easy way to determine and adjust your monitor resolution.

  1. Open Photoshop and create a blank square white page at 300 dpi utilizing the top tool bar File > New. For this example I made mine 7 x 7.  New Page Screen CS6
  2.  In Photoshop go to View > Print Size.
  3. Using a ruler or measuring tape carefully measure the width of the blank square white page. Be carefully not to scratch your display. I used a soft measuring tape and it worked great. My page measured 6 inches. Yours will undoubtedly be different. It depends on the monitor you are using.
  4. Next, divide the width of your white blank page by the measured inches. I divided 7 by 6 for a quotient of 1.16
  5. Multiple 1.16 by 72, which is the current screen resolution on your monitor. My answer was 83.52 that I rounded up to 84.
  6. The final step is go to Photoshop>Preferences>Units & Rulers and update the screen resolution to the number from step 5.  Units & Rulers Screen CS6

And that is a quick and easy way to synch your screen resolution to reflect your print size and hopefully gauge print output using the Print Size feature of Photoshop.  In order to utilize this function when viewing an image be sure to look at it in actual print size by going to the top tool bar in PS and selecting View>Print Size.  Also, this technique is geared for Photoshop CS6.

Thanks for reading and my work can be viewed at www.susanmcanany.com.


Wild and Free

The wild and free feeling from my adolescence seems to be an overwhelming feeling as of late. Maybe it is due to a big birthday I experienced recently or the doldrums of Florida’s summer weather urging me to a cooler climate. Whatever the source of my restlessness is really not important, however, I did have an ah-ha moment when I recently viewed a field of wildflowers. These flowers growing wild and in heavy concentration where living the epitome of a wild and free lifestyle totally unattended and where only the strongest survive.

I took several snaps as you can imagine. They were hard to capture due to a slight breeze and the sheer volume and density of the flowers. I didn’t want to wade too far into the field for fear of bug bites and who knows maybe even that ghastly poison ivy lurked. Once again I thought they are exhibited their wild and free attitude and this only added to their allure.

Many times I am pretty happy with my work right out of the camera, but right out of the camera didn’t do these wildflower justice, didn’t exactly portray their wild and free personalities. In Photoshop, after using the healing brush tool to clean up any sensor spots, I took the image into Nik Color Efex and used the Cross Processing Filter which give it more of the blue tone. I then used the Detail Extractor in certain places to pull out more of the intricacies of the flower pedal. And of course we have the bug! Love the bug!!

“Wild and Free”

wildflower abstract

Missouri Wildflowers

Thanks for stopping by and if you get a chance this summer, go out and do something that makes you feel wild and free! I know I will be.

More of my work can be viewed at www.susanmcanany.com.