Here lately I have been focusing on taking my Photoshop skills to another level and I came across some great information about how to Dodge and Burn using Photoshop non destructively. For those of you photographers that have never been in the darkroom, the dodge and burn tools originated there. The concept is to control the light from the enlarger as it hits a piece of photographic paper. Allowing more light to reach an area of the paper would increase the exposure or darken that area of a photo This technique was called “Burn” or “burning it in”. Alternatively, you could also block the light from hitting the photo paper using a piece of paper or your hand and this was called “Dodging”.
In Photoshop’s Toolbar there are two tools called the Dodge and Burn Tool and apparently using these two tools are fairly destructive to pixels of an image thus not very good for image quality. If you are concerned with IQ, Here is a quick and easy way to to dodge and burn your image non destructively. It is also good for creating a vignette on an image.
1) Create a New Blank Layer by going to Layer > New > New Layer or by clicking on the New Layer Icon at the bottom of the Layers Palette
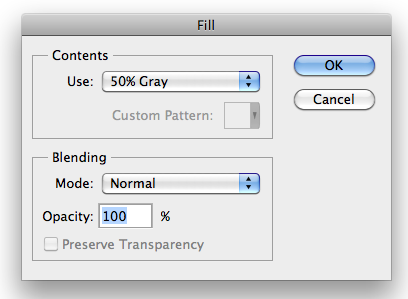
2) Fill the layer with 50% grey Edit > Fill . Your image will turn gray at this point. Don’t panic.
3) Create a Layer Mask by clicking the icon on the bottom of the Layers Palette. 4) Invert the Layer Mask – CMD/I. Your image should now reappear and your mask will turn black.
6) On the Layer Mask, paint with Black in areas you would like to be darker or “burn in”. Use the x key to switch to white and paint any areas you would like to be lighter or “dodge”.
Thanks for reading and more of my work can be viewed on my website or at my Etsy Store.

